Introduction
This document will explain how to use & navigate through the S-Docs template editor, including all of the buttons and tabs. The S-Docs template editor provides a powerful interface for creating attractive, data-driven documents. S-Docs templates are written in HTML, and the template editor provides two options for editing: a WYSIWYG editor (What You See Is What You Get) and an HTML Source editor. Changes made in one editor will be reflected in the other editor. For example, if you make text bold in the WYSIWYG editor, the text will be enclosed in <strong> tags in the source editor. Likewise, enclosing text in the source editor in <strong> tags would lead to bold text being displayed in the WYSIWYG editor.
Template Editor Tabs
Click a tab name to scroll down to its explanation.
Template Body
Header & Footer
Page Settings
Document Options
Email Settings
Auto Create Task
Runtime Prompts
Advanced Options
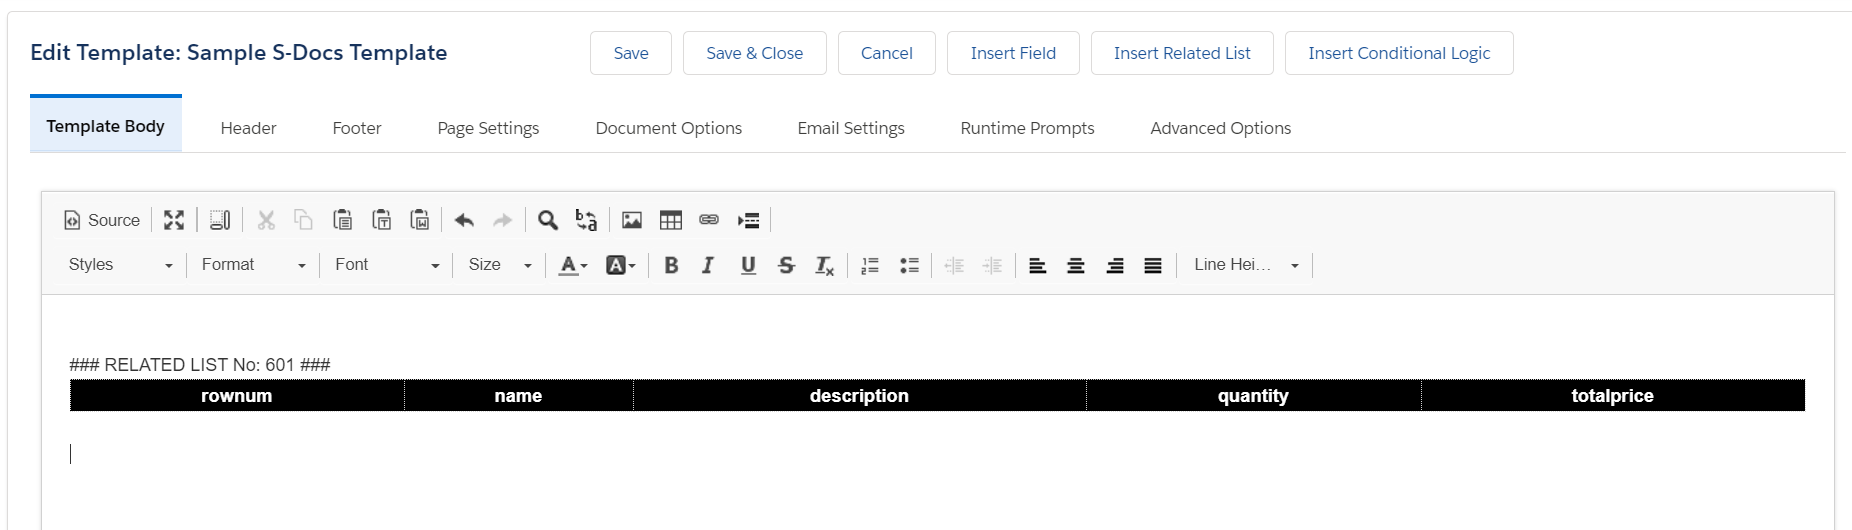
The Template Body Tab
This is the template body tab of the S-Docs template editor:
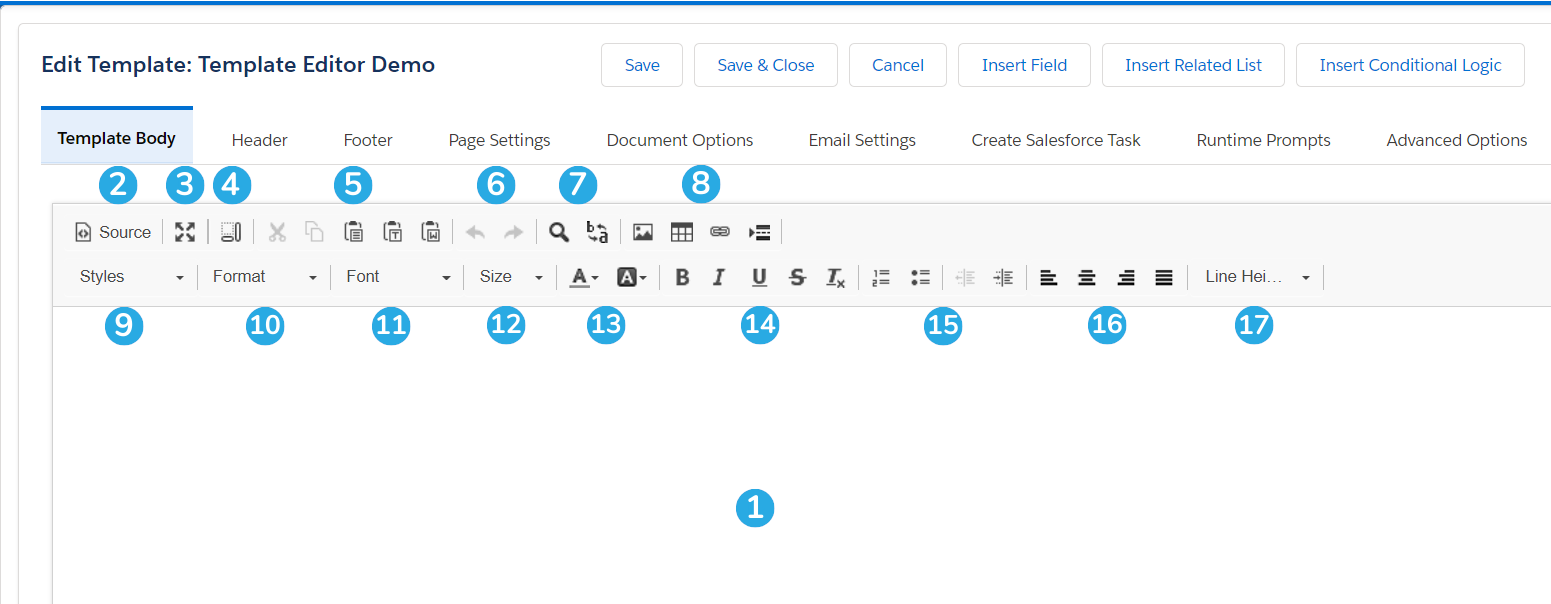
Click a number below to scroll down to its explanation.
An S-Doc template has a header, footer, and body, much like an MS Word document. Opening the template body tab reveals an editor for your template. Below are explanations of the components of this template editor. Note that you can hover over every button in the toolbar of the template editor for a very short description of that button’s function.
1) This is the WYSIWYG editor: the large, blank white area in the above image that looks similar to a blank Word document. WYSIWYG is an acronym for What You See Is What You Get, which perfectly describes the nature of this editor; you can create a template from scratch in this editor and when you generate the document down the road, it should appear the same as the content appears here. Use the tools in the toolbar to edit the content in this editor. [Back to Top]
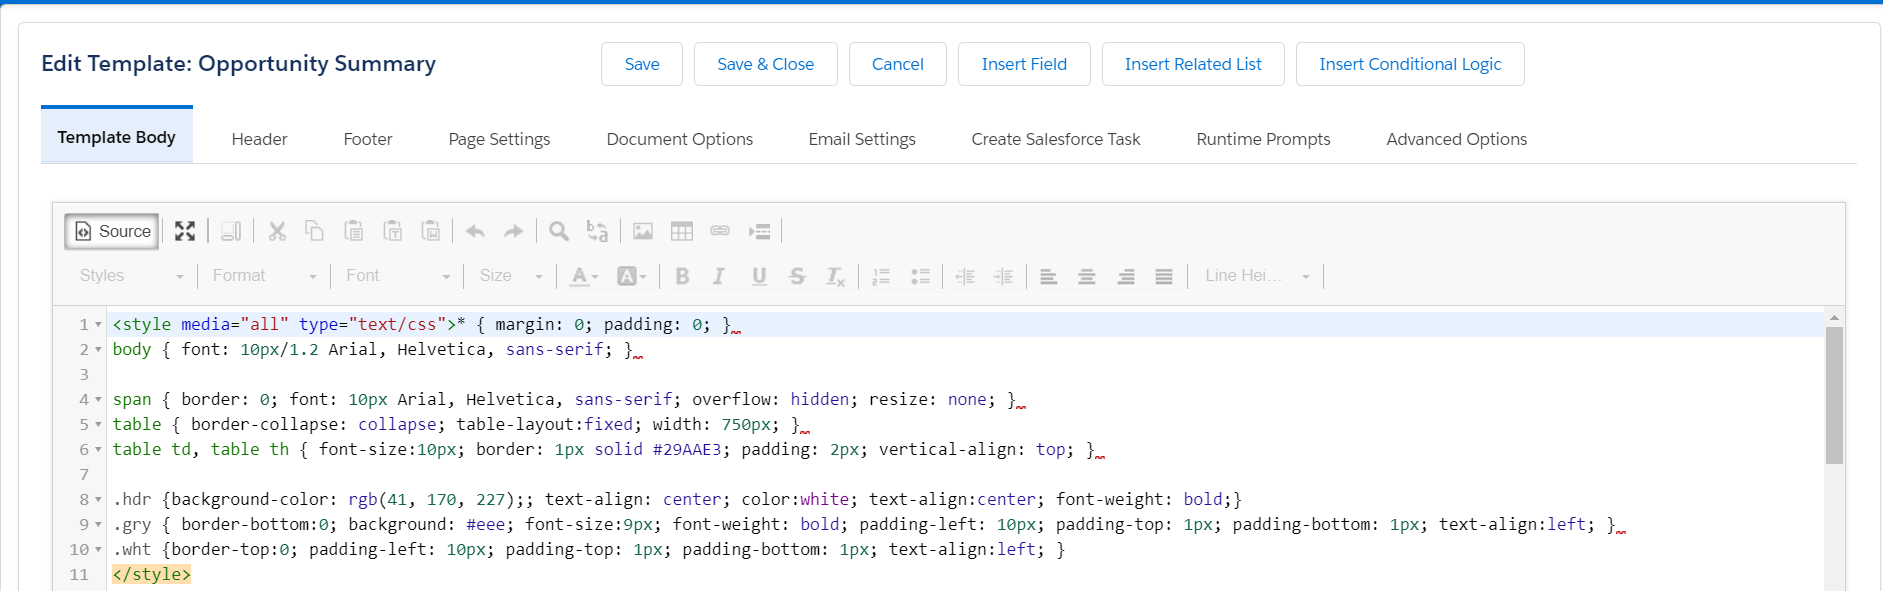
2) The Source button switches from the WYSIWYG editor to the source editor, allowing you to edit the HTML and CSS that represents your template. Note that you cannot use any of the buttons in the toolbar in the source editor; they are reserved for use in the WYSIWYG editor. When you make changes in the WYSIWYG editor, the background source updates automatically to reflect those changes. While simple and intuitive, the WYSIWYG editor does not support the same level of template customization that the source editor does. Below is an example of a template in the WYSIWYG editor:
Here is that same template in the source editor:
[Back to Top]
3) This is the Maximize button. Clicking it will hide the tabs and buttons, and expand the WYSIWYG editor itself. [Back to Top]
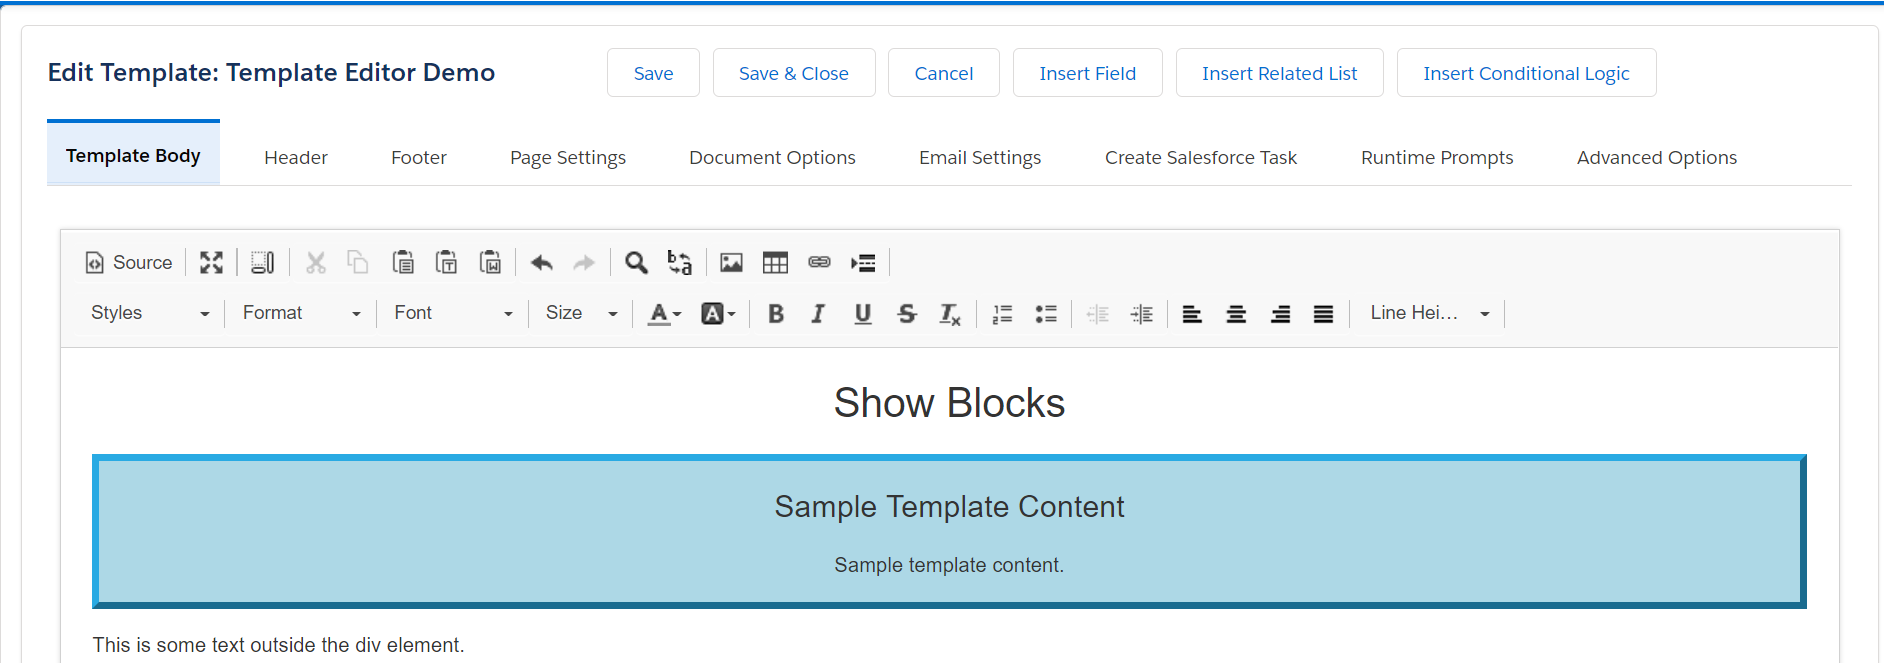
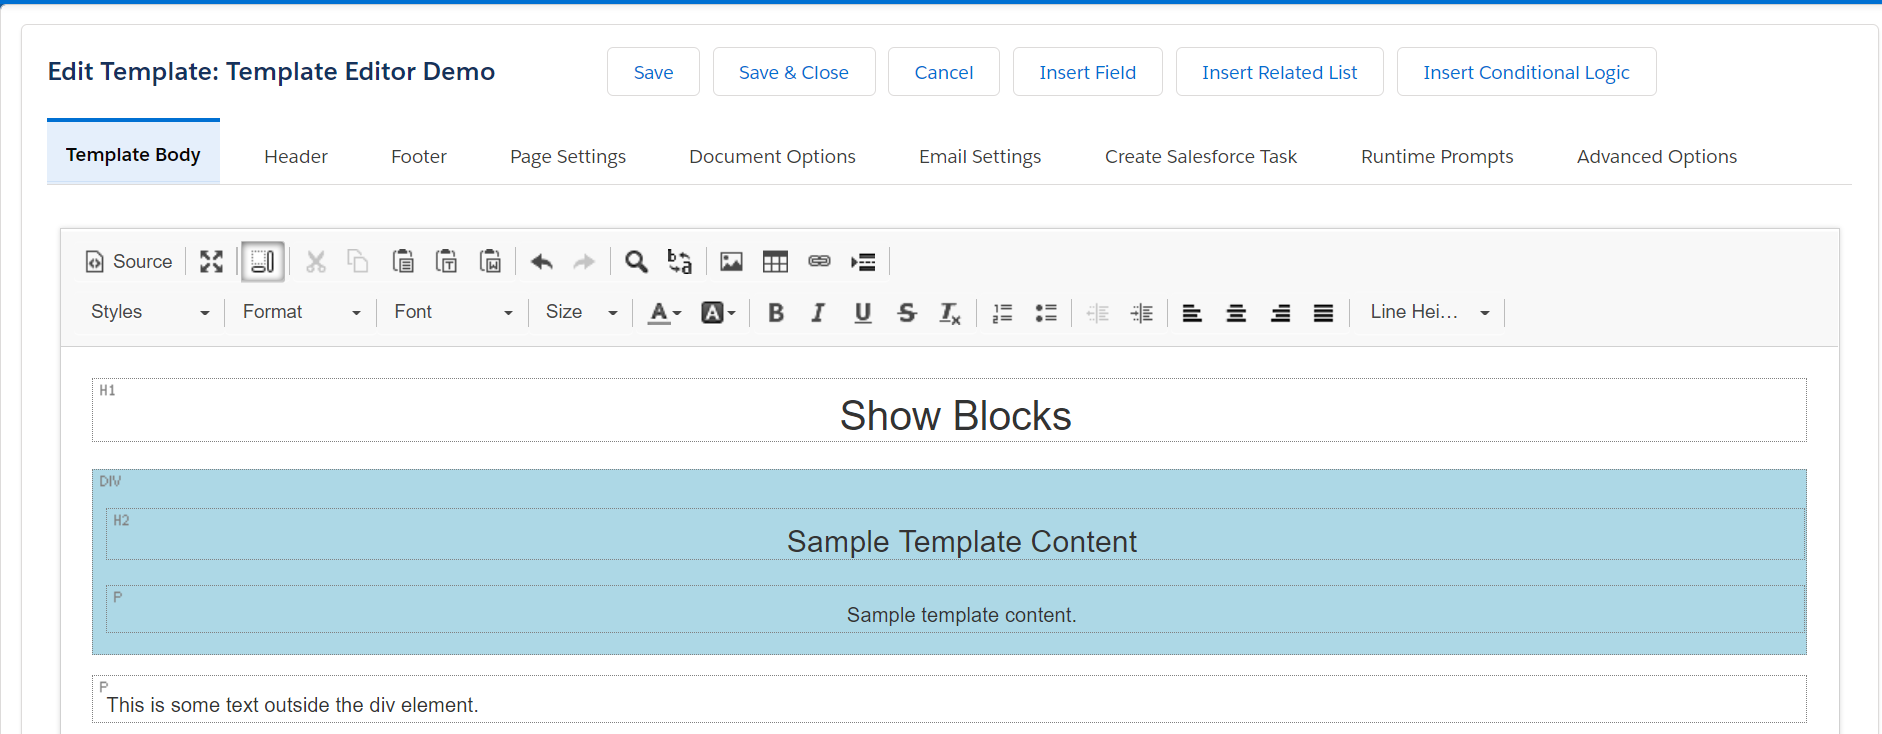
4) This is the Show Blocks button. Clicking it will display the types of HTML tags that content is displayed in. In the following example, the information is between stored in <div> tags. Here it is first with Show Blocks turned off:
And here it is with Show Blocks turned on, exposing the DIVs:
[Back to Top]
5) These buttons are for Cutting, Copying, and Pasting, respectively. There are three different kinds of pastes: Paste simply pastes whatever is copied to the clipboard, Paste as plain text pastes plain text with the formatting and images of the original source removed, and Paste from Word will accurately paste content copied from MS Word. Note that there are a few considerations to take into account when using Paste from Word; click here to read more about this option. [Back to Top]
6) These are the Undo and Redo tools. Use them to undo or redo previous actions. [Back to Top]
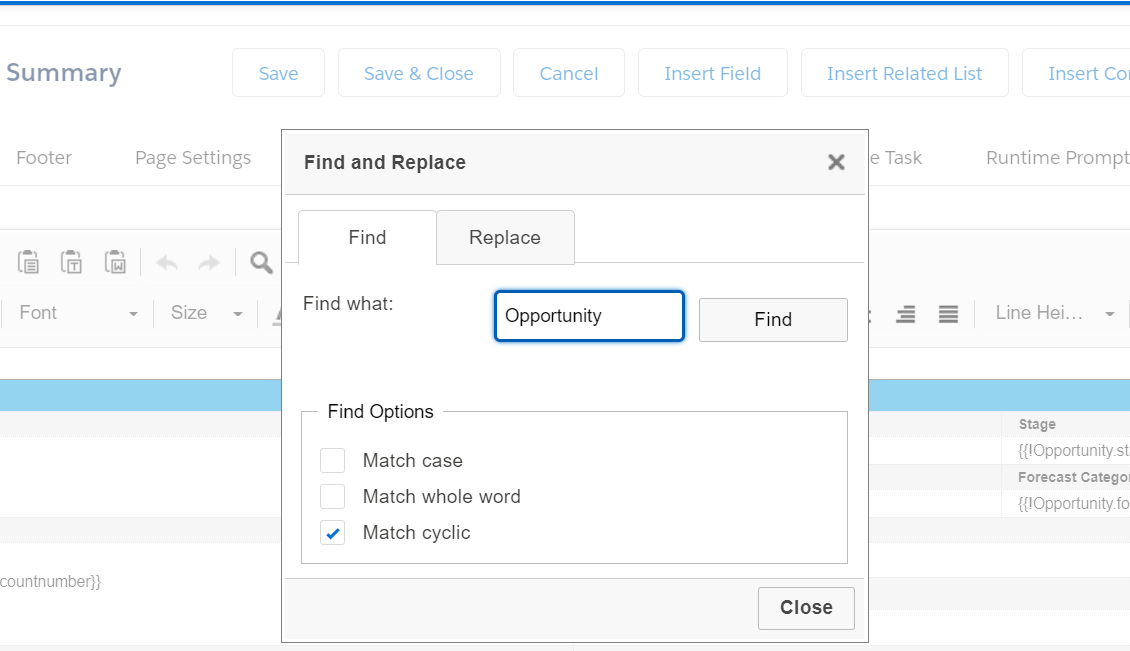
7) These are the Find and Replace tools. Use Find to find words within your editor, and use Replace to replace all occurrences of a certain word/string with a different word/string. [Back to Top]
8) These are the Insert tools. Use them to insert images, tables, hyperlinks, and page breaks, respectively. [Back to Top]
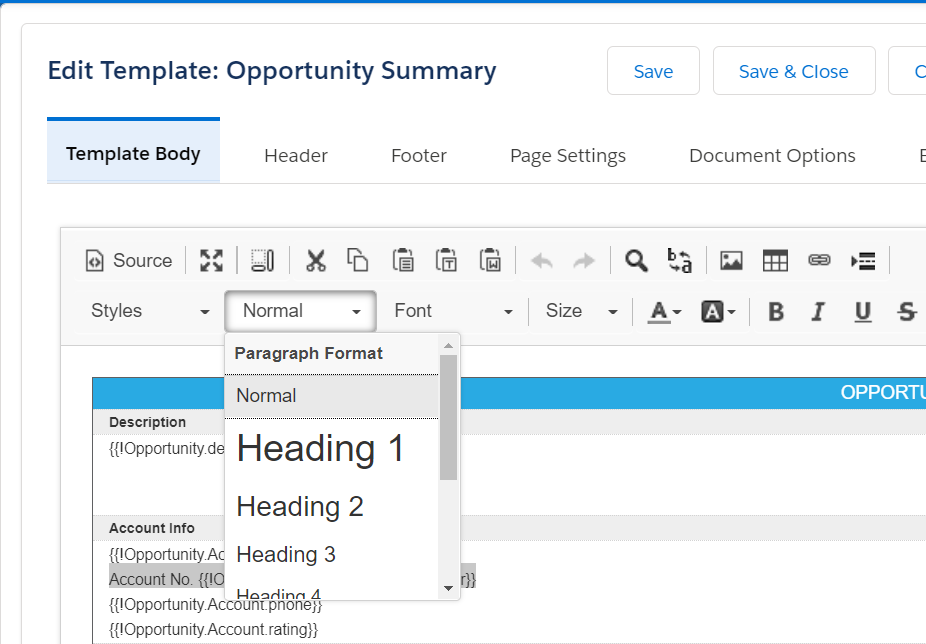
9) This is the Styles menu. You can select text in your document and then select a style from the Styles menu to apply that style to the selected text. [Back to Top]

10) This is the Format menu. You can select text in your document and then select a style from the Format menu to apply that format to the selected text. [Back to Top]
11) This is the Font menu. Use it to change the font of selected text. [Back to Top]
12) This is the Size menu. Use it to change the size of selected text. [Back to Top]
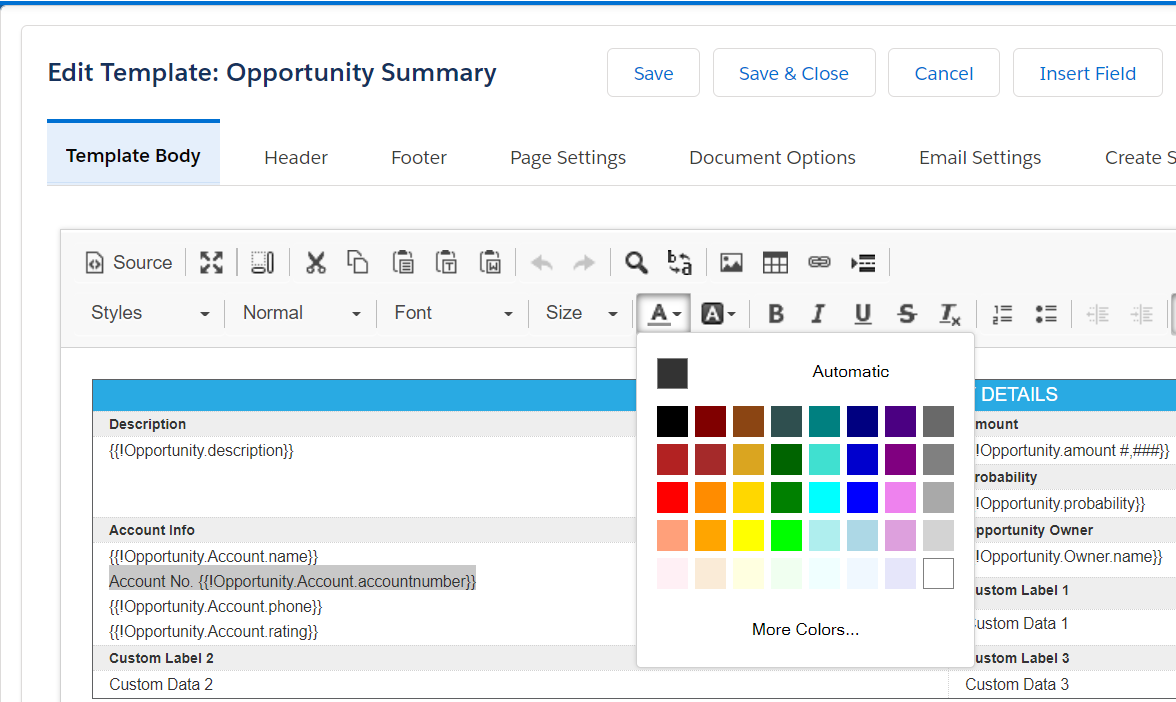
13) These are the Font Color controls. Use them to to change text color and text background color. [Back to Top]
14) These are Text Formatting tools. Use them to make text bold, italic, underlined, stricken-through, or to remove all formatting of the selected text. [Back to Top]
15) These are List tools. Use them to create ordered or unordered lists, and to increase or decrease the indentation of these lists. [Back to Top]
16) These are Alignment tools. Use them to change the alignment of text on the page. [Back to Top]
17) This is the Line Height menu. You can use it to select the amount of spacing between a specific line. [Back to Top]
The HTML code in the source editor will automatically update at every change made to reflect the changes made in the WYSIWYG editor using the tools listed above.
The Header and Footer Tabs
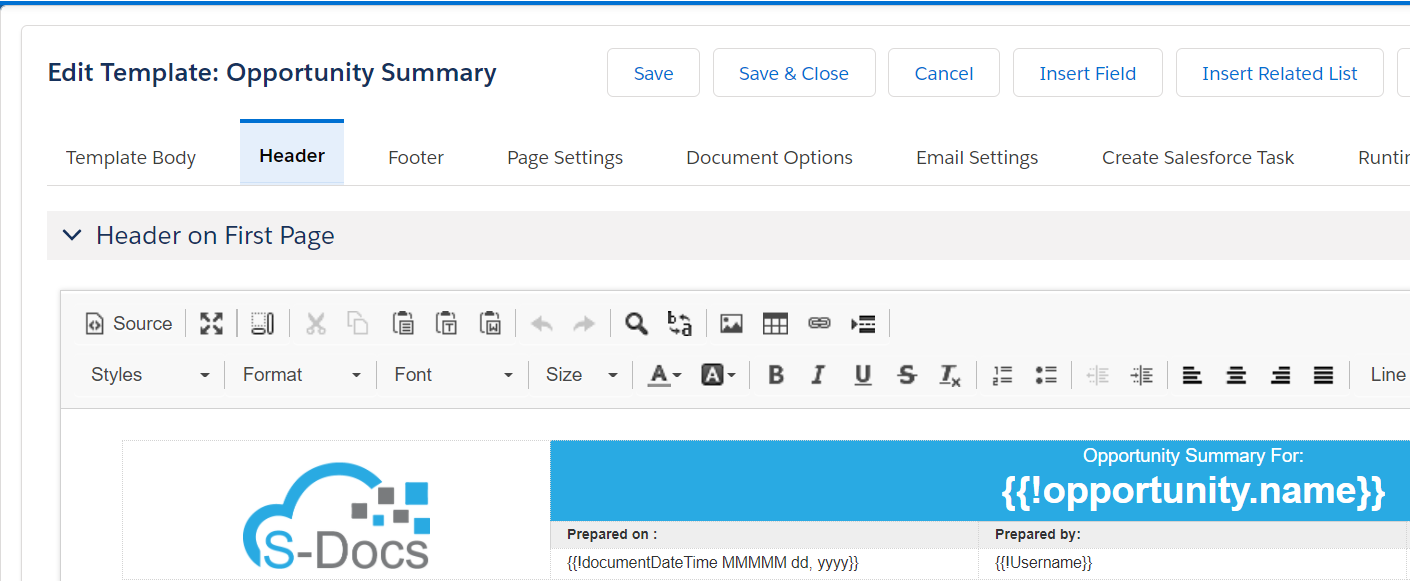
The Header tab and the Footer tab are identical, with the obvious exception that the header tab can be used to add headers to your template and the footer tab can be used to add footers to your template. Here is the header tab:
Opening Header on First Page or Header on Remaining Pages will reveal the same editor discussed above in The Template Body Tab. You can use it to design your template header/footer in the exact same way that you design your template body. If you would like to have the same header/footer on every page, design your header/footer in the Header/Footer on First Page editor, and make sure the Use First Page Header/Footer for All Pages checkbox under Header/Footer on Remaining Pages is checked.
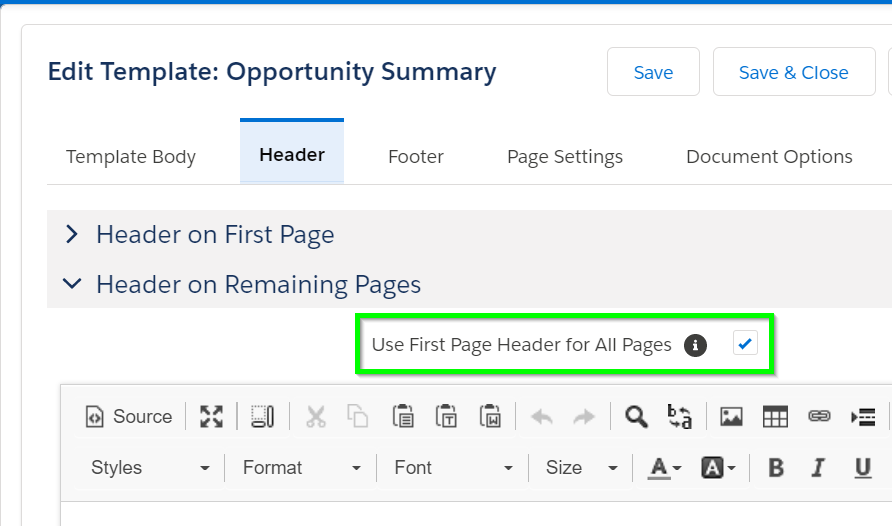
If you would like the first page to have its own header/footer, and for all remaining pages to share a different header/footer, uncheck this box and edit the header/footer for the first page in the Header/Footer on First Page tab, and edit the header/footer for all remaining pages in the Header/Footer on Remaining Pages tab.
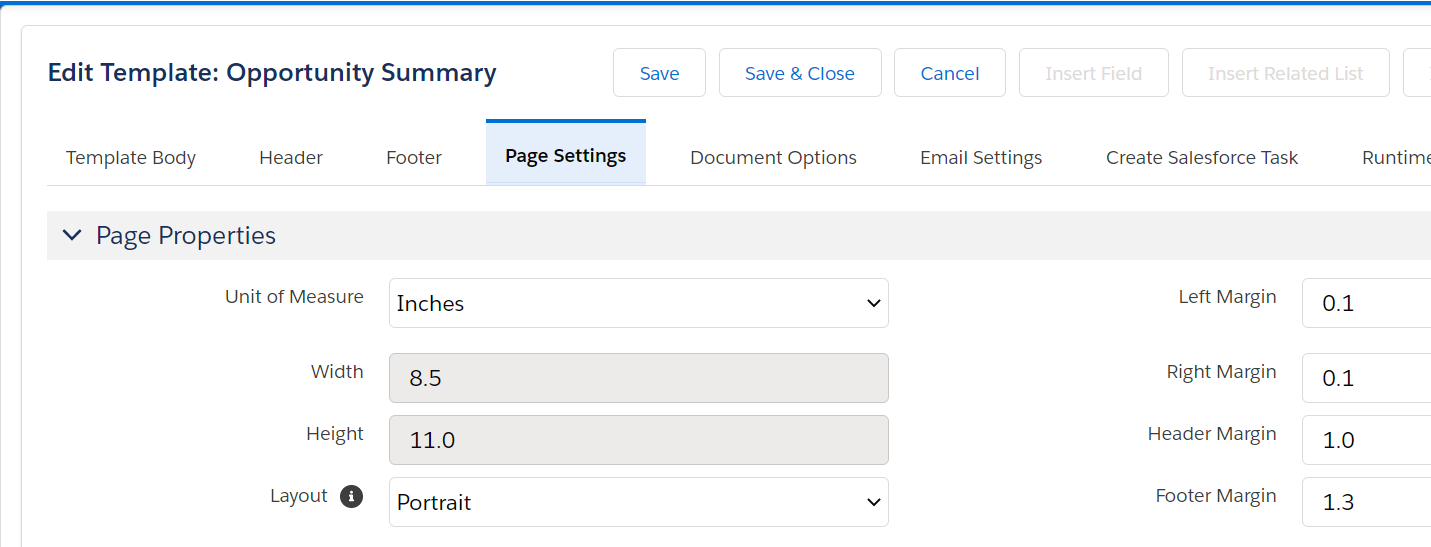
The Page Settings Tab
The page settings tab contains controls for the width, height, and margins of the page. You can select inches, centimeters, or pixels as your unit of measurement and adjust the dimensions of the page and margins as you wish. Standard portrait and landscape options are provided for you in the Page Layout field; choosing either of these options will lock the Page Width and Page Height fields. You can select Custom instead to edit each field yourself.
The Document Options Tab
The Document Options tab contains four sections: Attachment & File Name Options, Attachment & File Options, Mass Merge Options, and Other Options.
Note: The Mass Merge Options will only appear if you have configured the
S-Docs Mass Merge feature in your org.
Attachment & File Name Options:
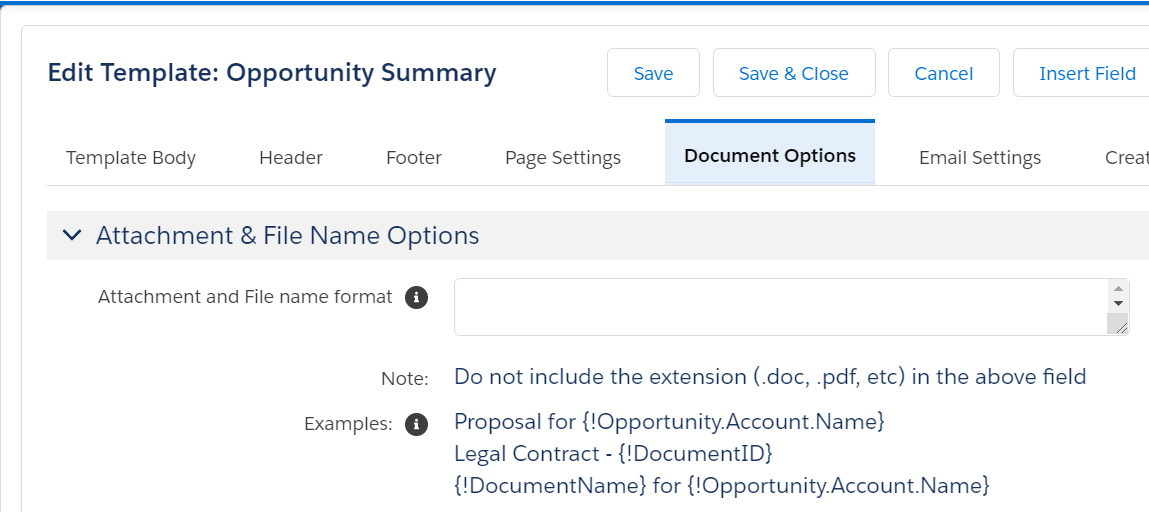
By default, generated S-Docs are named something like SD-0001.pdf. In this field, you can change the name of generated S-Docs to whatever you’d like. You can use static text or merge fields. For example, setting “Proposal For {!Opportunity.Account.Name}” as the output file format would result in the generated S-Doc being Proposal For John Smith.pdf rather than the default SD-0019.pdf. Note that merge fields must use single braces as opposed to double.
Attachment & File Options

1 & 2: Here, you can choose to automatically create a Salesforce Attachment or Salesforce File that will show up in your base record's Files or Notes & Attachments related list each time a document is generated with this template.
3. This option will cause a new Salesforce Attachment to be created only if the document is emailed.
4. If you have opted to create a Salesforce Attachment or File each time this template is generated, the default behavior is to delete these related Attachments or Files whenever the corresponding S-Doc record is deleted. This is a clean-up measure. You can uncheck this box if you want to preserve all Attachments or Files regardless of linked record deletes.
5. This enables the Live Edit feature. When checked, end users will be able to edit this document in their browser after it is generated.
6. If the Live Edit feature is enabled, you can check this box so that users can rename new Salesforce Attachments that are created each time a user edits the generated document. This option only applies if checkbox #7 is checked.
7. If the Live Edit feature is enabled, you can check this box so that new attachments are automatically created each time a user edits the generated document.
Mass Merge Options:
Note: These options will only appear if you have configured the
S-Docs Mass Merge feature in your org.

1. Checking this box will bring up the email page after the mass merge is finished and allow the user to email the consolidated document.
2. When a mass merge is created, a copy of the combined document will be saved in the Salesforce Documents folder. Checking this box will stop this from happening.
3. Choose to not create page breaks between documents during mass merge.
4. You can enter fields that you want documents to be sorted by in the mass merge and indicate the sort direction. Don't include the base object in this field; if you want to sort by {{!Opportunity.name}}, for example, you would just write "name asc" instead of "Opportunity.name."
- To sort by a number field, specify asc/desc and add the "num" indicator. Example: "amount desc num"
- To add multiple fields, separate them with commas.
- Pro Tip: Use the Insert Field tool to make sure the field(s) after the base object is correct
5. An S-Doc Job is created for each record included in a mass merge. Checking this box will clear the S-Doc Jobs after the user clicks Combine all into single printable document. This keeps the system clean, but is not required.
6. An S-Doc Job is created for each record included in a mass merge. Checking this box will clear the S-Doc Jobs after the user clicks Send Email from the mass merge page. This keeps the system clean, but is not required.
7. Create a single summary doc in XML of all documents generated in the mass merge (XML format only)
8. You can create a page break after every n number of documents here. This is useful for things like receipts that are being printed.
Other Options:

1. Check this box if your template contains international characters; otherwise, they may not display.
2. Show all warning messages during document generation. If unchecked, S-Docs will only display critical error messages.
3. If your international characters aren't displaying correctly even when you check checkbox #1, you can set the Unicode Enforcement Level to "Data” or "Strict" to ensure that they display properly.
4. You can set the amount of template versions that you want to save in the version history. A new version is created each time you click Save in the template editor. The version history can be viewed on the template detail page.
5. If you are creating a document for a case, checking this box will automatically pull articles from that case and attach it to the outbound email along with the document.
6. Checking this box will save all merge field data within the document to an S-Doc Record as an XML field. This is useful if you want to use the merge field data after document generation.
7. Checking this box will redirect the user back to the base record after they generate this template.
The Email Settings Tab
The email settings tab contains options for controlling the behavior when this template is emailed. There are four sections in this tab: Email Subject Settings, Email Recipient Settings, Email Sender Settings, and Other Email Settings.
Email Subject Settings
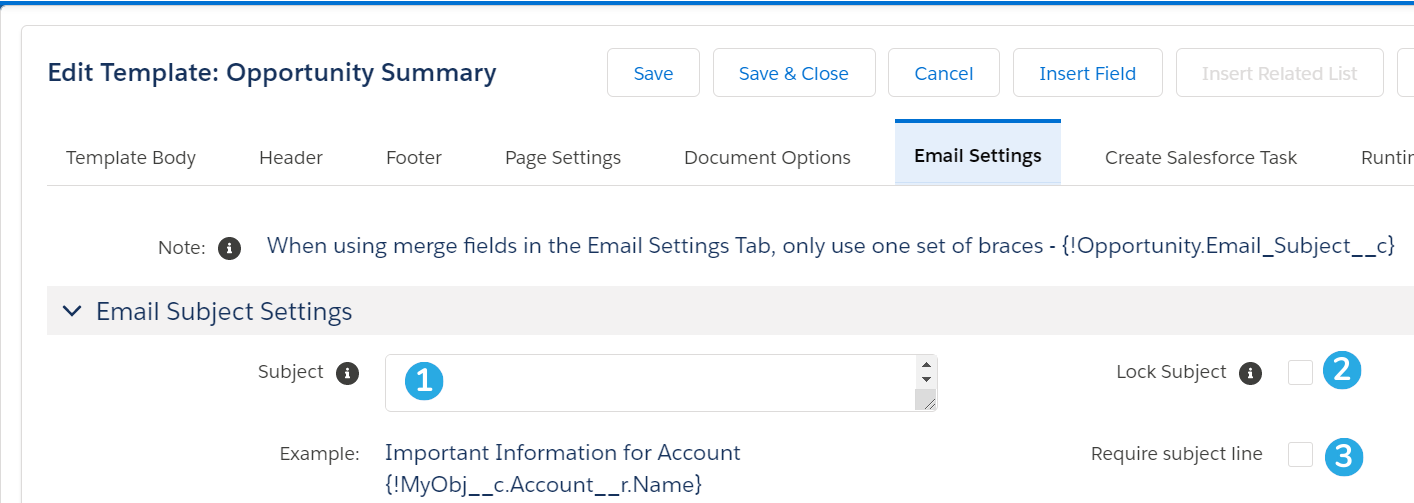
1. Optionally enter an email subject. You can use static text or merge fields (make sure to use single braces as opposed to double).
2. Check this box to lock the Subject field to the end-user. If you leave the Subject field blank when this box is checked, the entire Subject field will be hidden on the S-Docs email page.
3. Check this box to require end-users to enter an email subject before emailing this document.
Email Recipient Settings

1. Optionally set the To, CC, or BCC email fields. You can use static text or merge fields (make sure to use single braces as opposed to double).
2. Lock the To, CC, or BCC fields so that end-users cannot edit them. Note that if you leave the To field blank when you lock it, this template will not be able to be emailed. If you leave the CC or BCC fields blank when you lock them, these fields will be hidden on the S-Docs email page.
Email Sender Settings
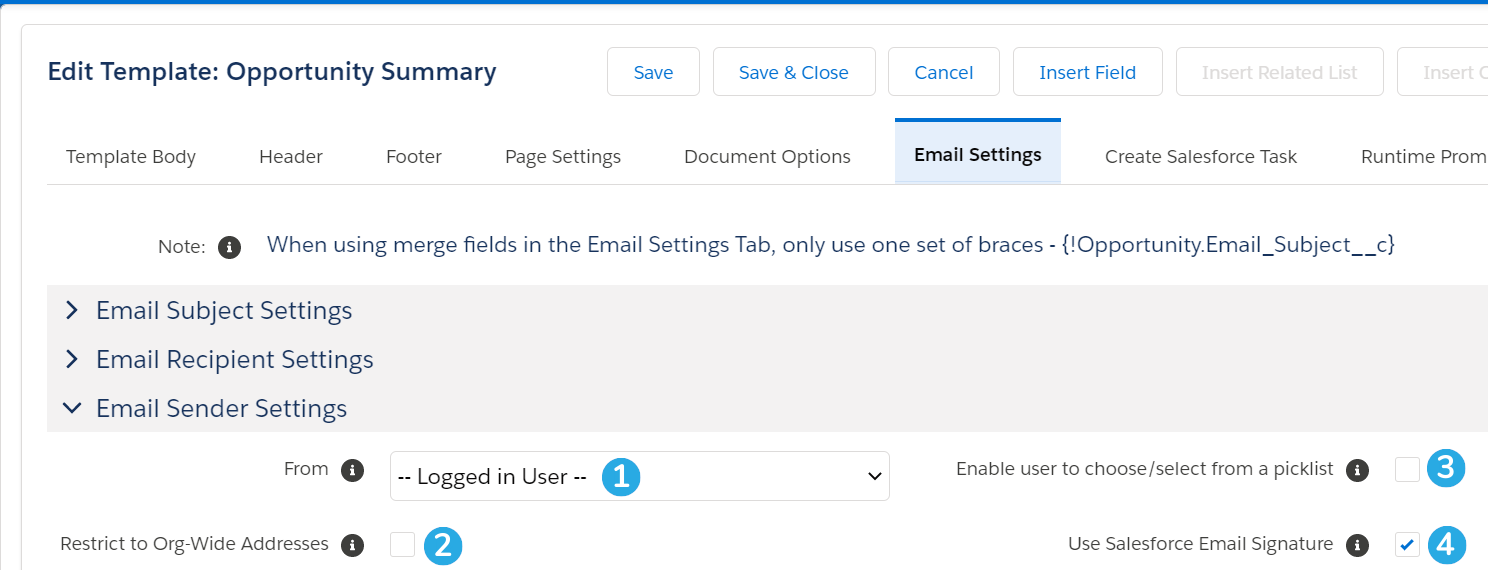
1. Choose to send this document from the email address of the logged in user, or from one of your Org-Wide email addresses.
2. Check this box to restrict the email From field to an org-wide email address. This prevents this document from being sent as the logged in user.
3. Check this box to allow the end-user to pick from a list of your Org-Wide email addresses to send this document from.
4. Check this box to allow users to use their Salesforce Email Signature in email body templates. You can insert the {{{!UserSignature}}} special merge field to reference the generating user's email signature once this box is checked.
Other Email Settings

1. Enter a comma-delimited list of email domains to restrict users from emailing this document to anyone outside of those domains. Example: sdocs.com,trailhead.edu
2. Check this box to prevent the end-user from modifying the email body when sending this document.
The Create Salesforce Task Tab
The Create Salesforce Task tab can be used to configure your template to automatically generate a Salesforce task whenever a document is generated using that template. This tab is hidden by default; to enable it, navigate to the SDocsSettings Custom Settings record (Setup > Custom Settings > SDocsSettings > Manage > Edit). Check the Enable Create Salesforce Task Feature checkbox.

There are four sections in the Create Salesforce Task tab: Salesforce Task Settings, Salesforce Task Subject, Salesforce Task Status, and Salesforce Task Activity Date.
Salesforce Task Settings
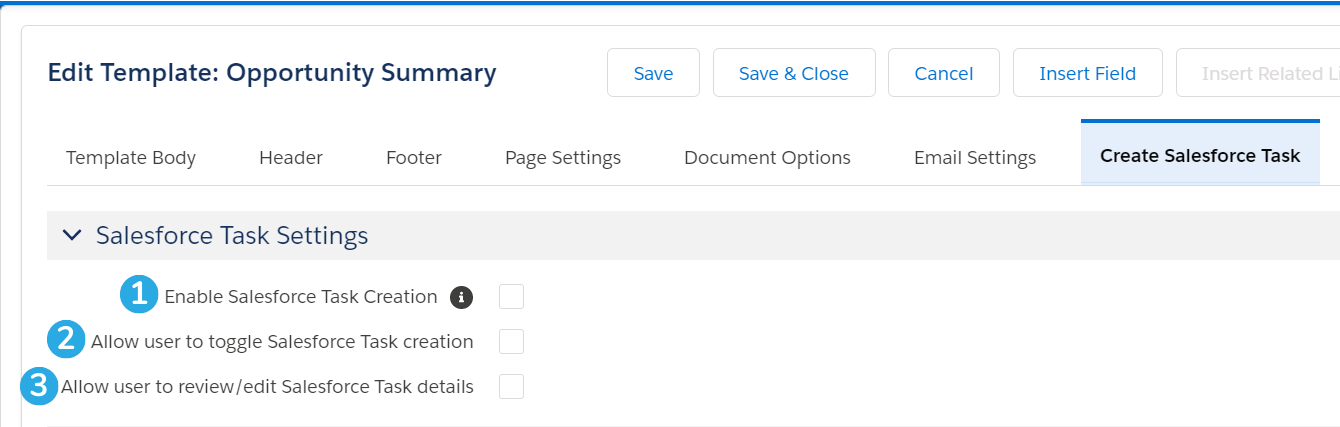
1. Check this box to enable the Create Salesforce Task feature and automatically create a new Salesforce task whenever this template is generated.
2. Check this box to allow the user to choose whether or not a Salesforce Task should be created each time this template is generated.
3. Check this box to allow the user to edit the details of the Salesforce Task for this document before it's created.
Salesforce Task Subject
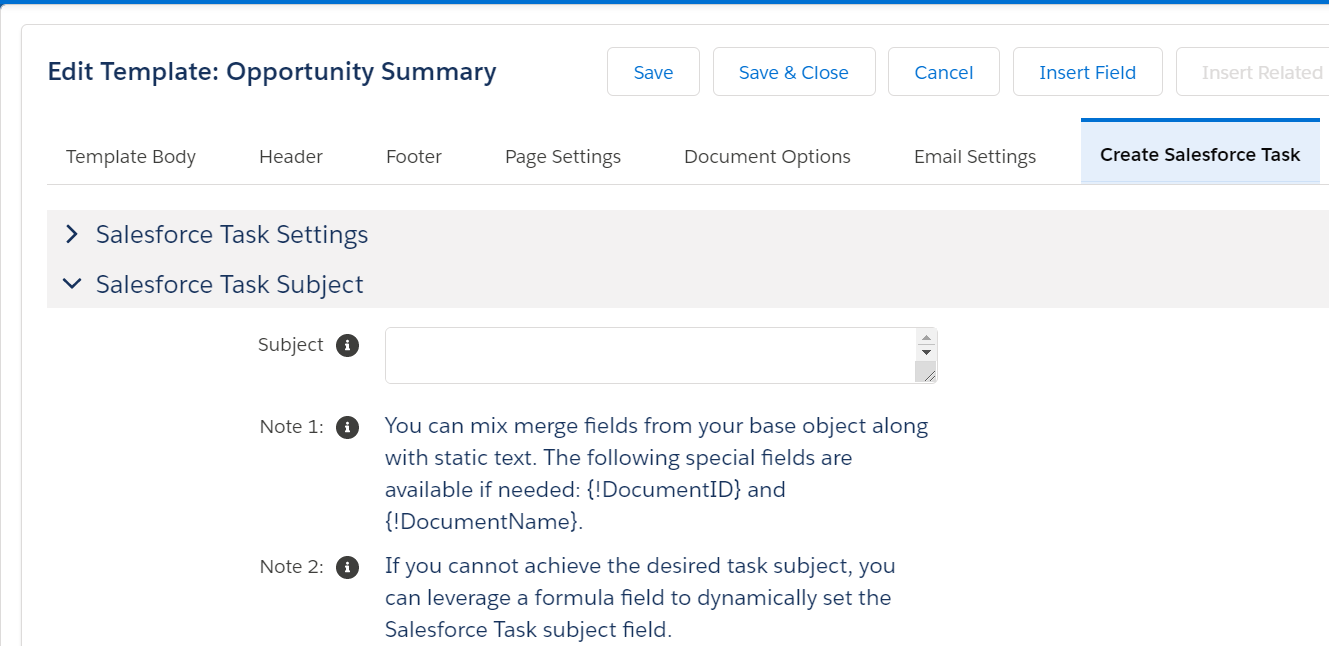
You can optionally enter a Salesforce Task subject here. You can use static text or merge fields (make sure to use single braces as opposed to double). If you do not enter a subject, it will default to "S-Doc Generated:Template_Name."
Salesforce Task Status
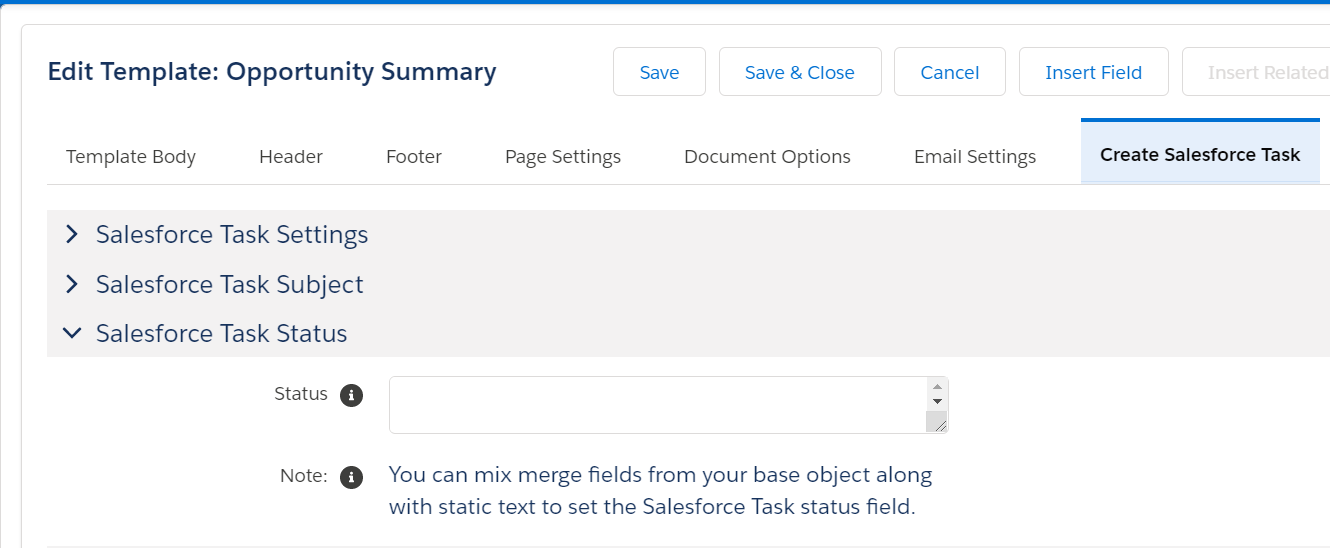
You can optionally enter a Salesforce Task status. You can use static text and merge fields (make sure to use single braces as opposed to double). If you do not enter a status, it will default to Completed and go directly to the Activity History list, as opposed to the Open Activities list.
Salesforce Task Activity Date
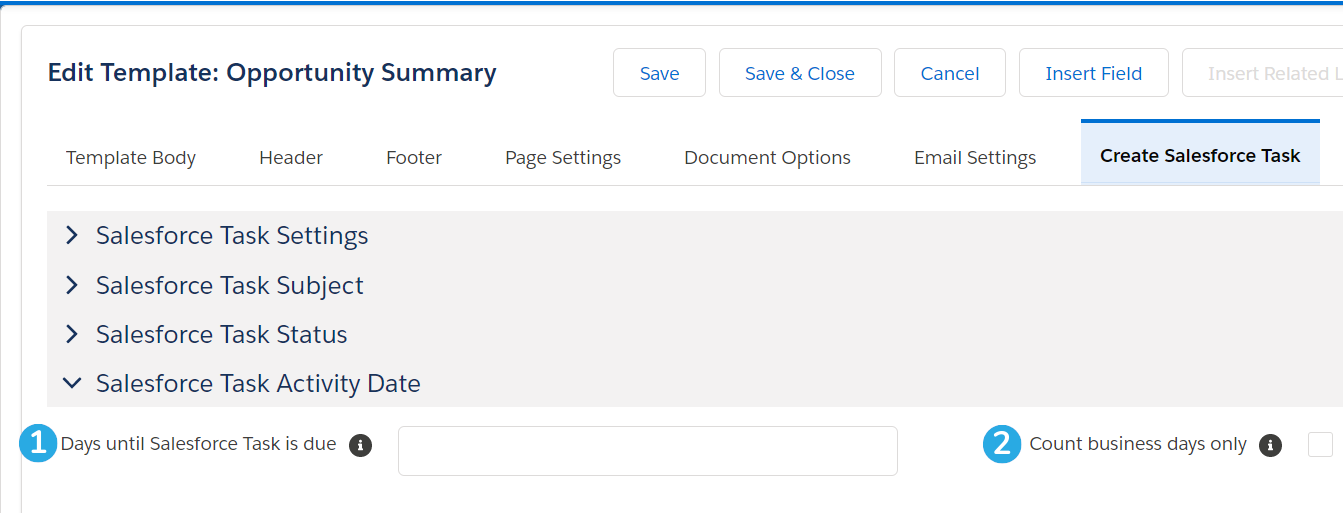
1. Optionally enter the number of days until this task is due. If this field is left blank, the due date will default to the date that the document is generated on.
2. Check this box to count only weekdays when calculating the task due date (weekends will be excluded, but holidays will be included).
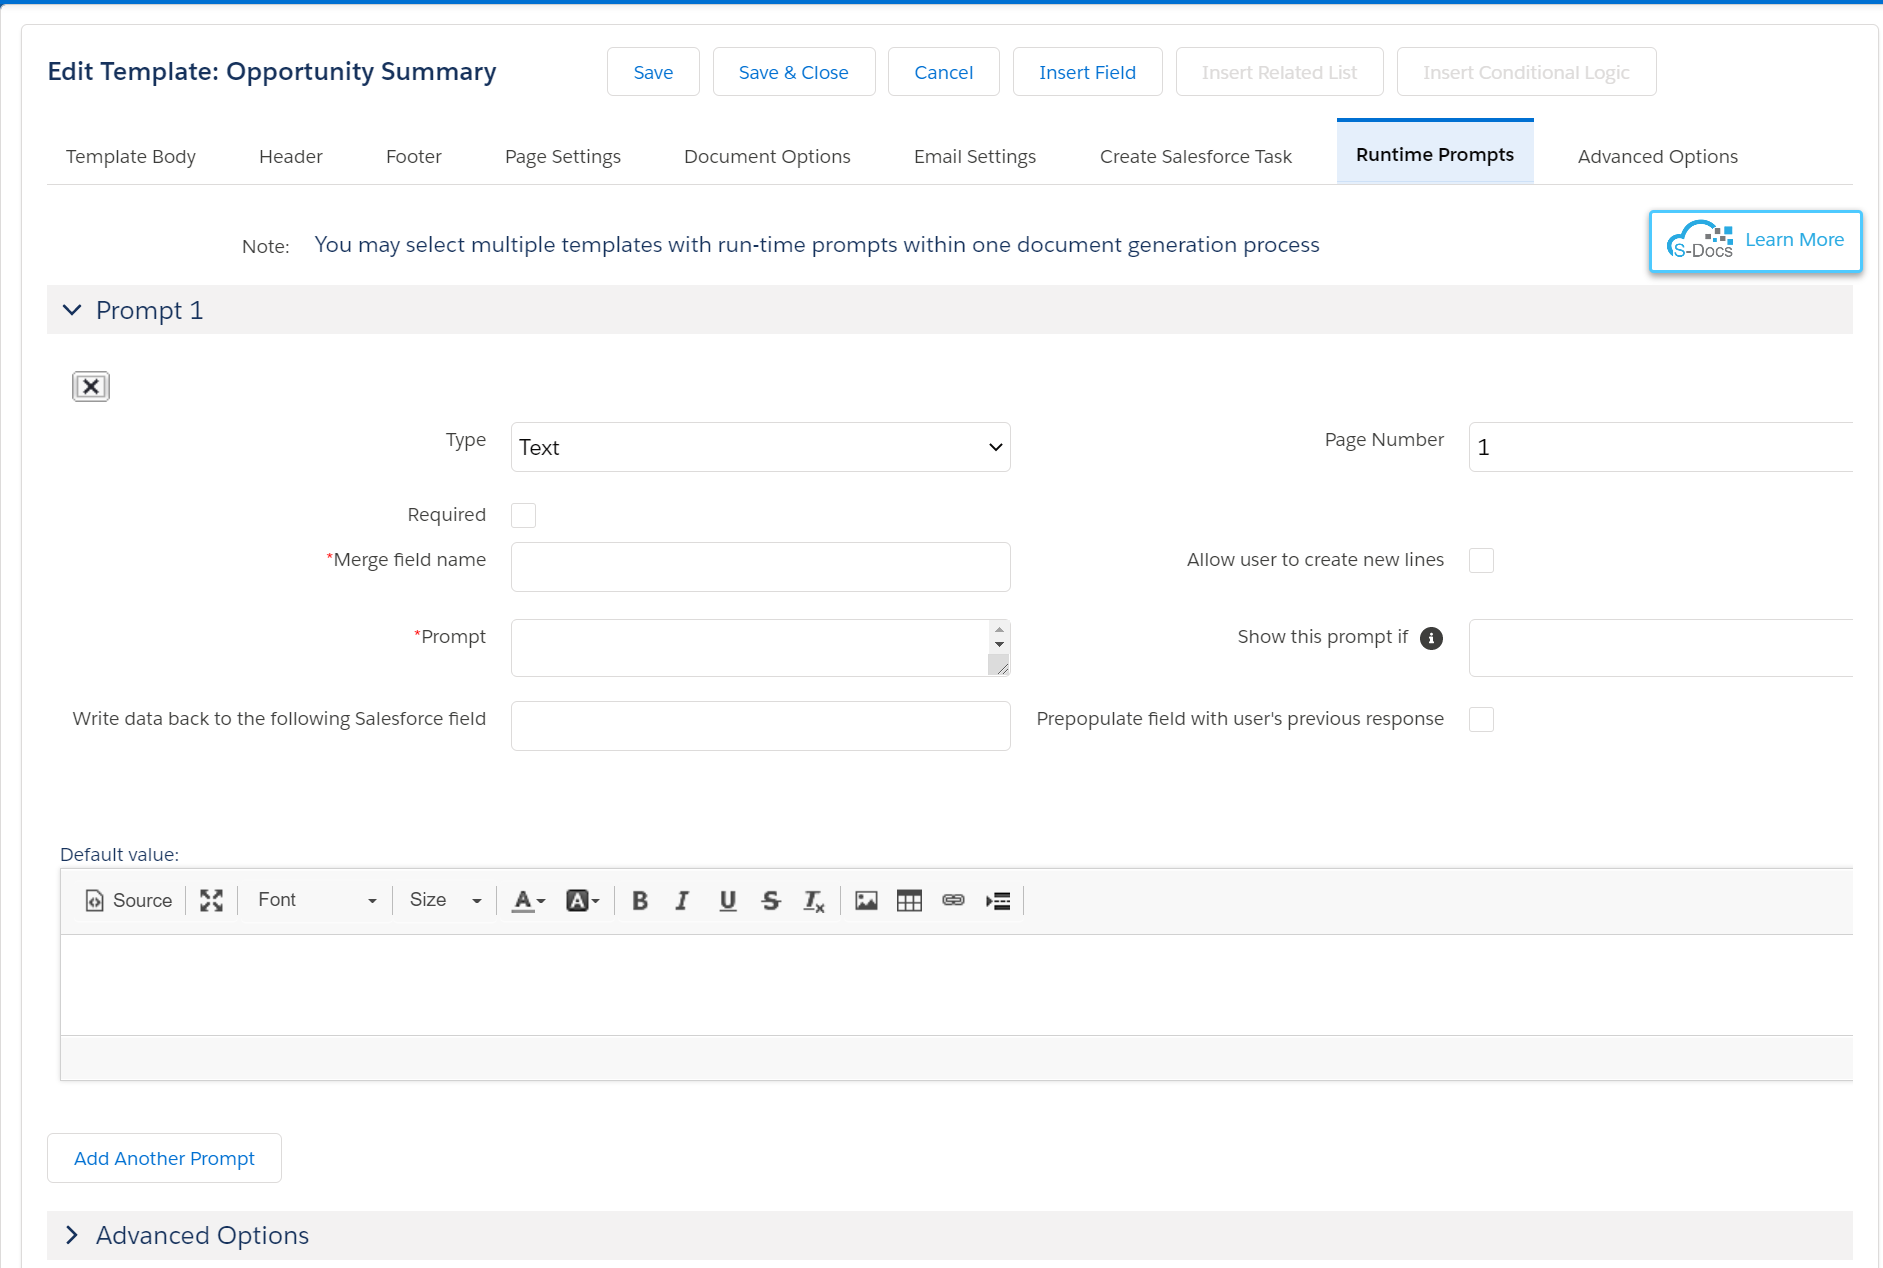
The Runtime Prompts Tab
In this tab, you can create text, date, checkbox, or related list prompts for users to input information into during document generation. User input will then be merged into the document at runtime based on merge fields that you define. Click here for an in-depth explanation of runtime prompts.
The Advanced Options Tab
The Advanced Options tab contains three sections: Advanced Template Settings, Export Template, and Configure Contact Lookup.
Advanced Template Settings
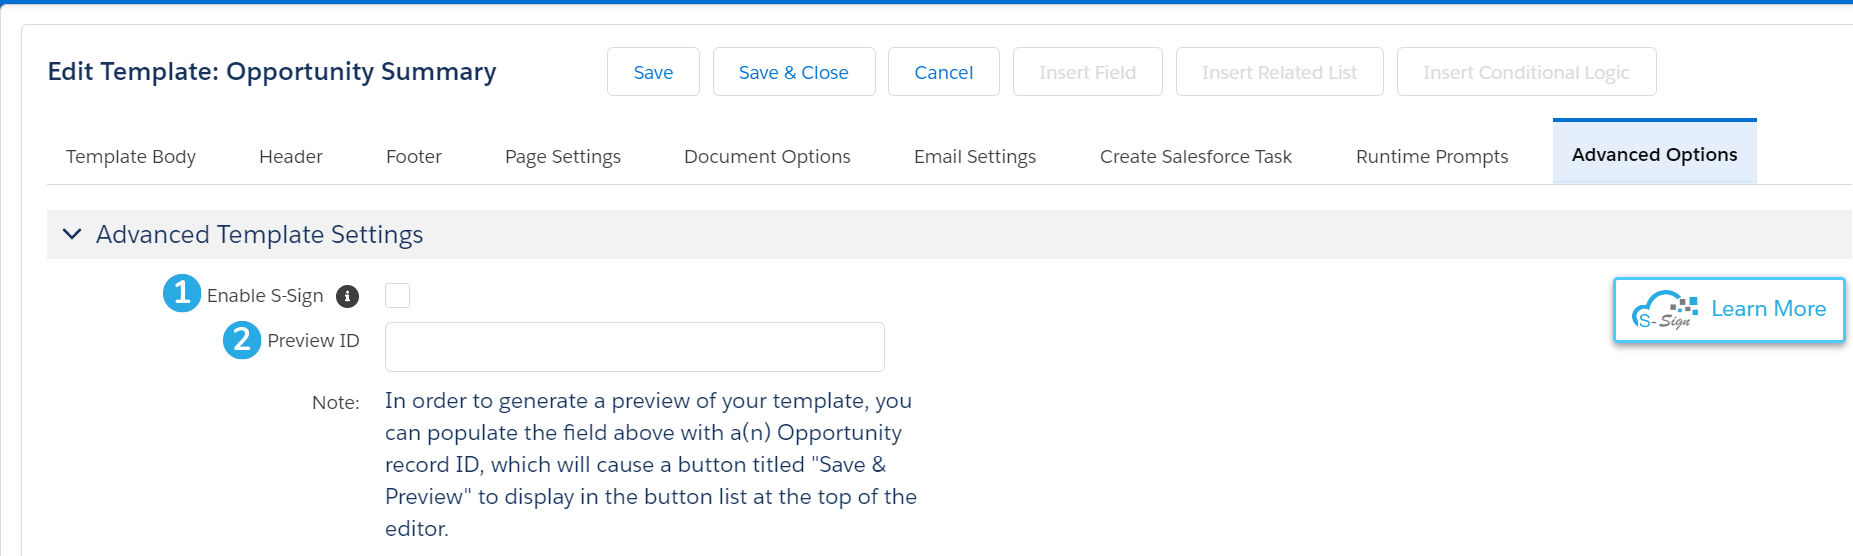
1. The Enable S-Sign checkbox will open up the S-Sign e-signature panel, which allows you to add e-signature tags to your template (along with other types of input) and send the generated document for e-signature with our e-signature add-on product S-Sign. The checkbox will be disabled unless you've downloaded the trial or full version of S-Sign. For more information about installing and configuring S-Sign, click here.
2. The Preview ID field allows you to enter a Salesforce record ID, and then preview the final generated document using data from that record. When you enter an ID into this field, a Save & Preview button will appear at the top of the template editor. Clicking this button will Save your template and generate a preview document in a new tab.
Export Template
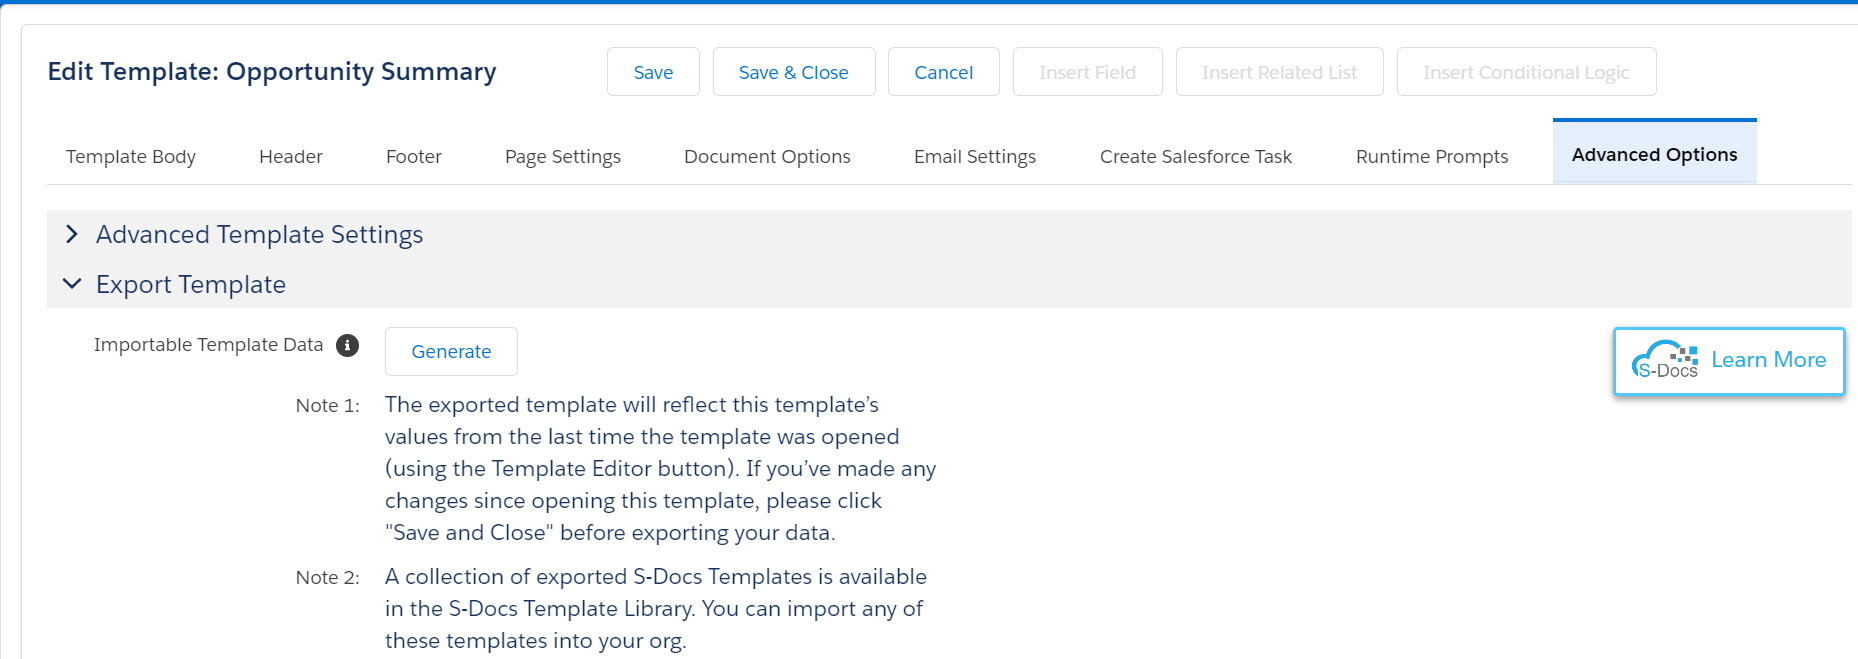
To move this template between orgs, you can click Generate to generate a string of importable template data that can be used to create a clone of this template in another org. Click here to learn more about exporting individual templates. Click here to learn more about exporting large numbers of templates.
Configure Contact Lookup

Templates with a Related To Type of Opportunity or Account can contain a number of special contact merge fields. When these fields are included in a template, the user will be able to select contact records during the document generation process that should be merged into the document. This list includes contact records related to the base record that the template is generated from; however, [1] the Additional Contact Roles for Lookup list in this section allows you to choose additional objects for S-Docs to query for contact records. Any records found will be added to the contact selection picklist.
[2] If you would like to limit which contacts show up in this list, you can input a WHERE clause (omitting the WHERE) that dictates which contacts should appear in this list. Note that this query will affect the contact picker for special contact merge fields and the S-Docs Email page.
Note: This section only appears for templates with a Related To Type of Opportunity or Account.
Template Editor Buttons
These are the Template Editor buttons. Click a number to scroll down or be redirected to its explanation.
1 | 2 | 3 | 4 |
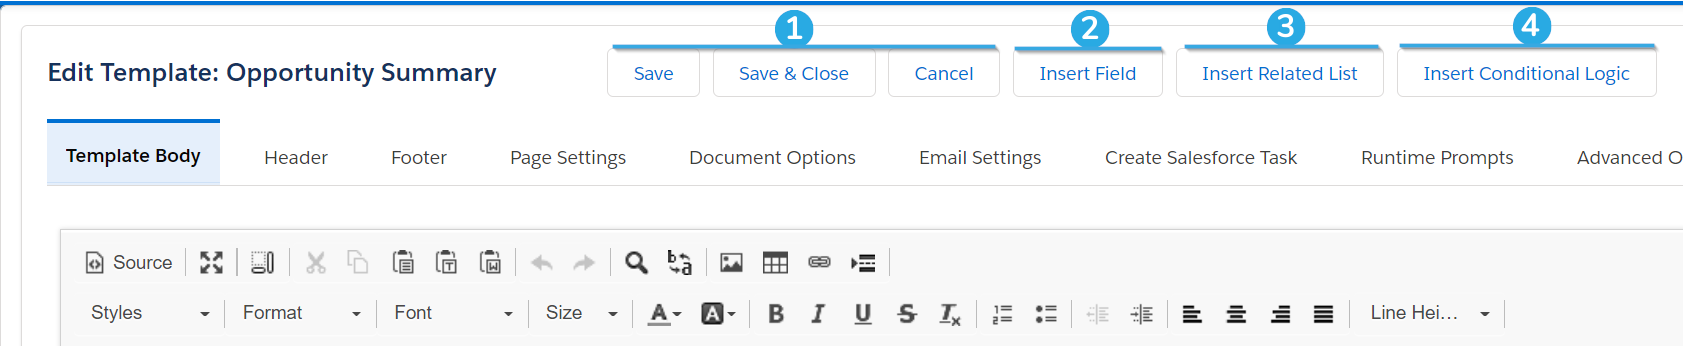
1. Save, Save & Close, Cancel
Save saves your work. Save and Close saves you work and takes you back to the template detail page. Cancel removes all edits made after the last save and take you back to the template detail page.
2. Insert Field
Clicking this button will bring up the Insert Field menu.
Object Fields
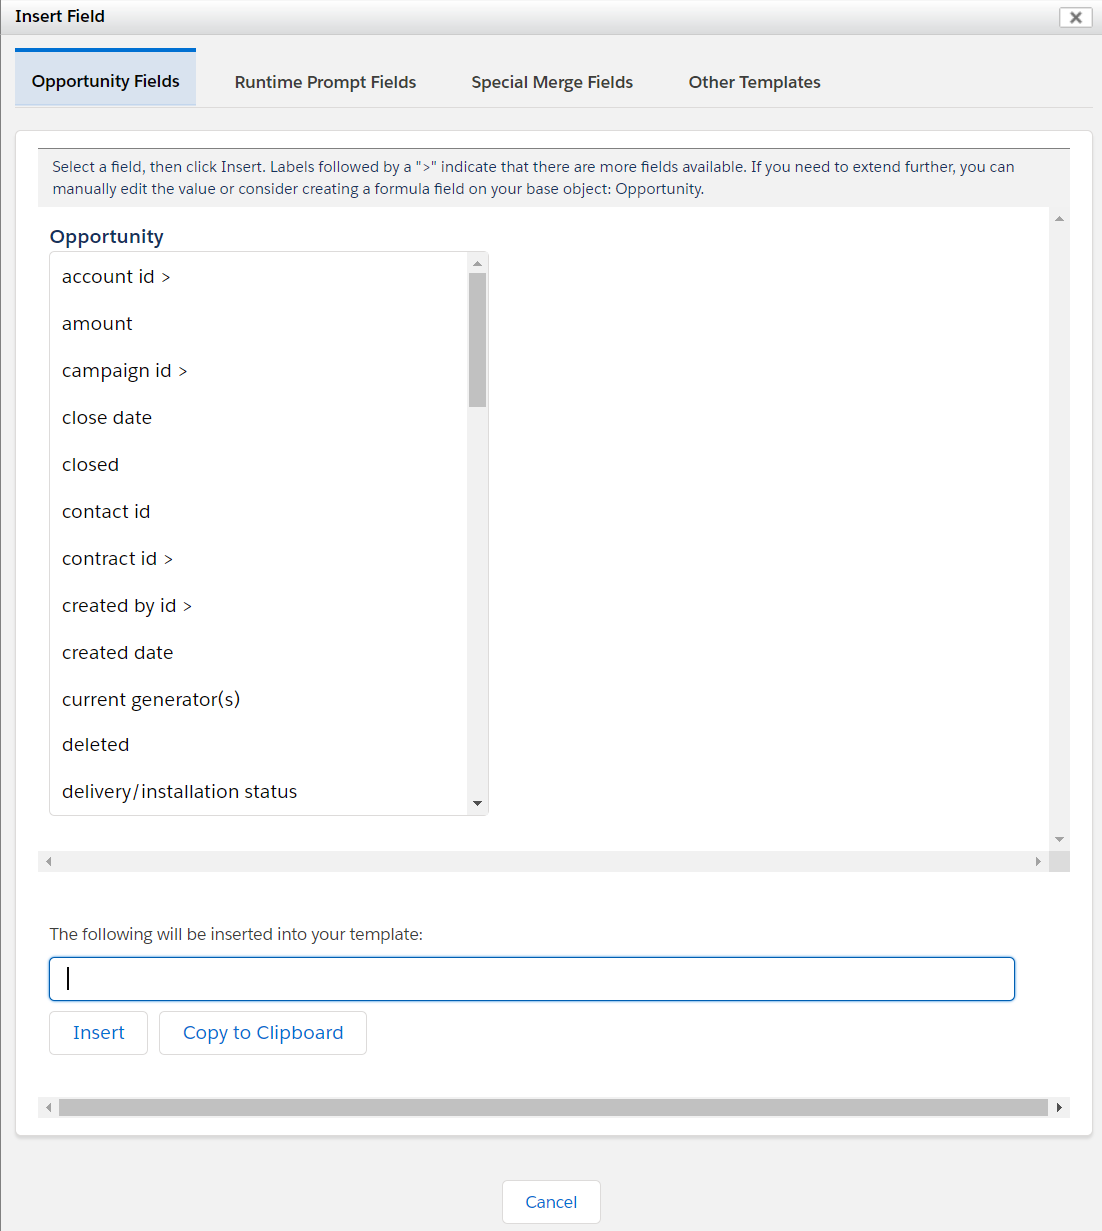
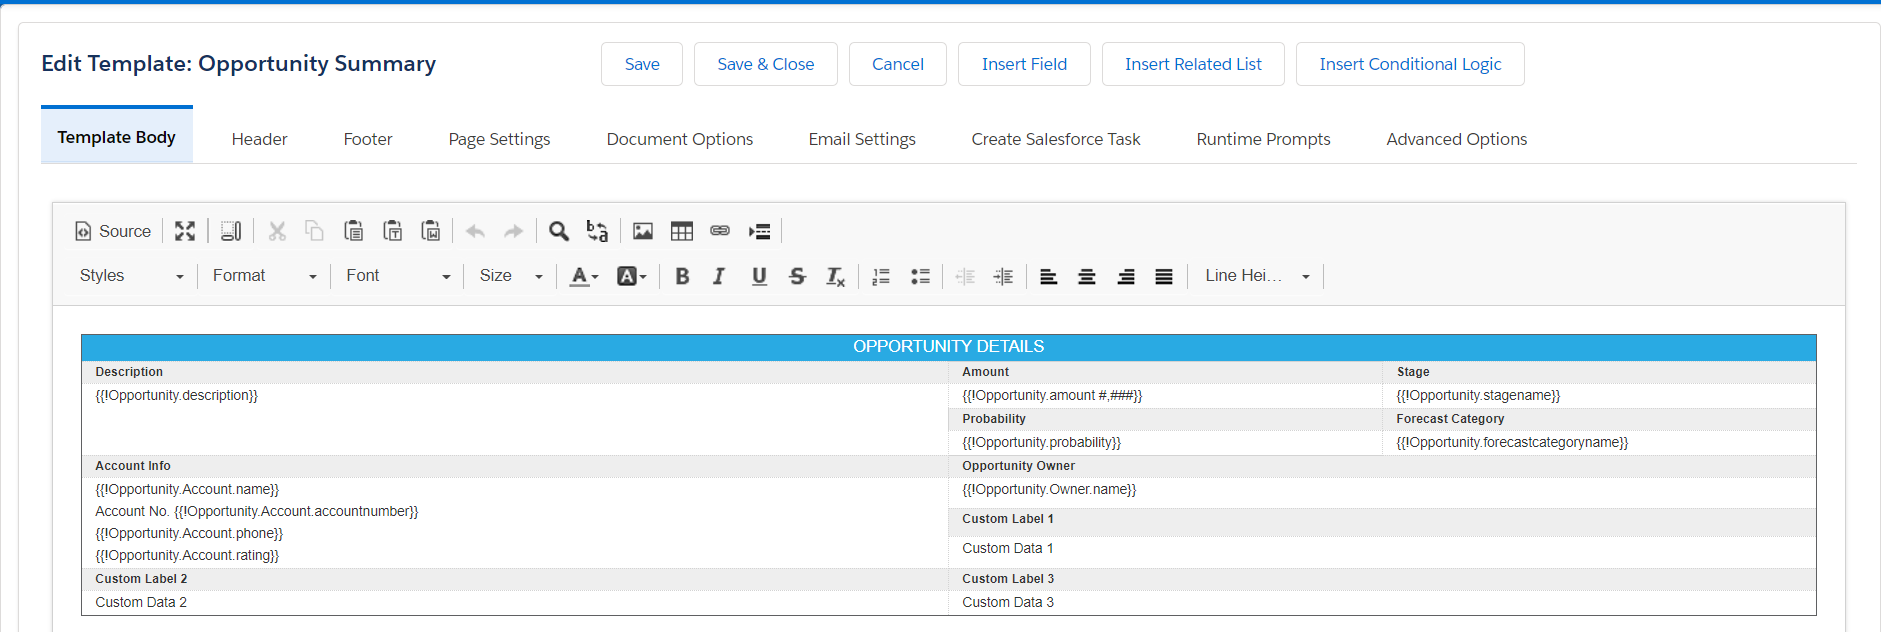
The first tab of this menu contains all of the fields from the template's base object (which was set when the template was created) that are available to the user who is editing the template. If certain fields are restricted from the user, they will not show up here. Since our example template's base object is Opportunity, we see opportunity fields.
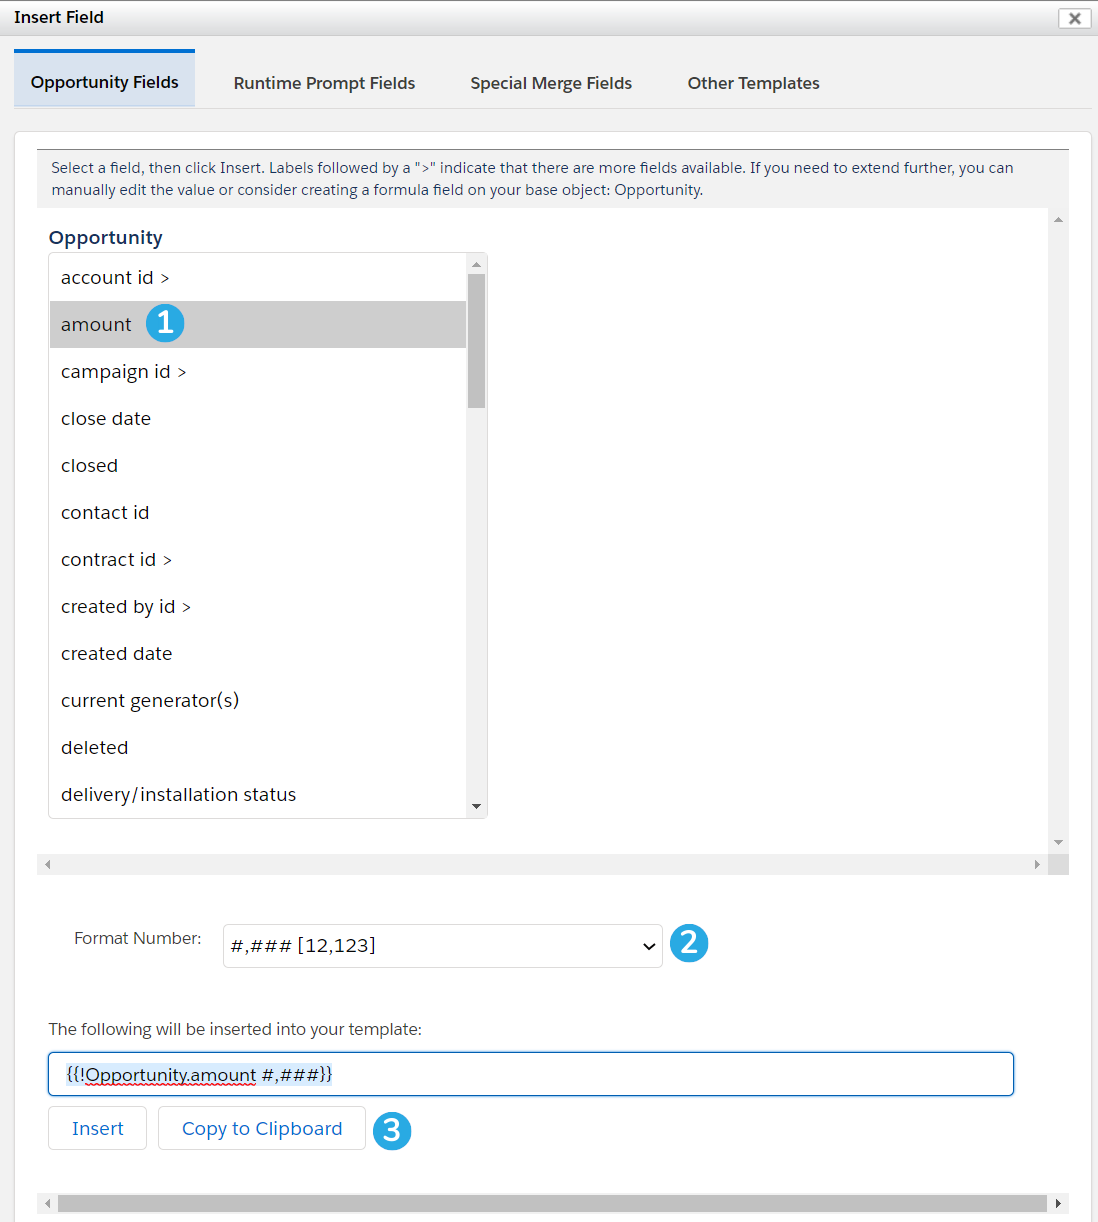
1. Select a field from the list.
2. If your field requires formatting (such as number or date fields), you can select how you want the data to display using the picklist below the field menu.
3. You can click Insert to insert the merge field wherever your cursor last was in the template editor, or click Copy to Clipboard to copy the field and paste it yourself.
The Insert button will only work in the Template Body tab; if you are working in the Source of the Template Editor, for example, or you want to insert a field into a Header, you will need to copy and paste it manually.
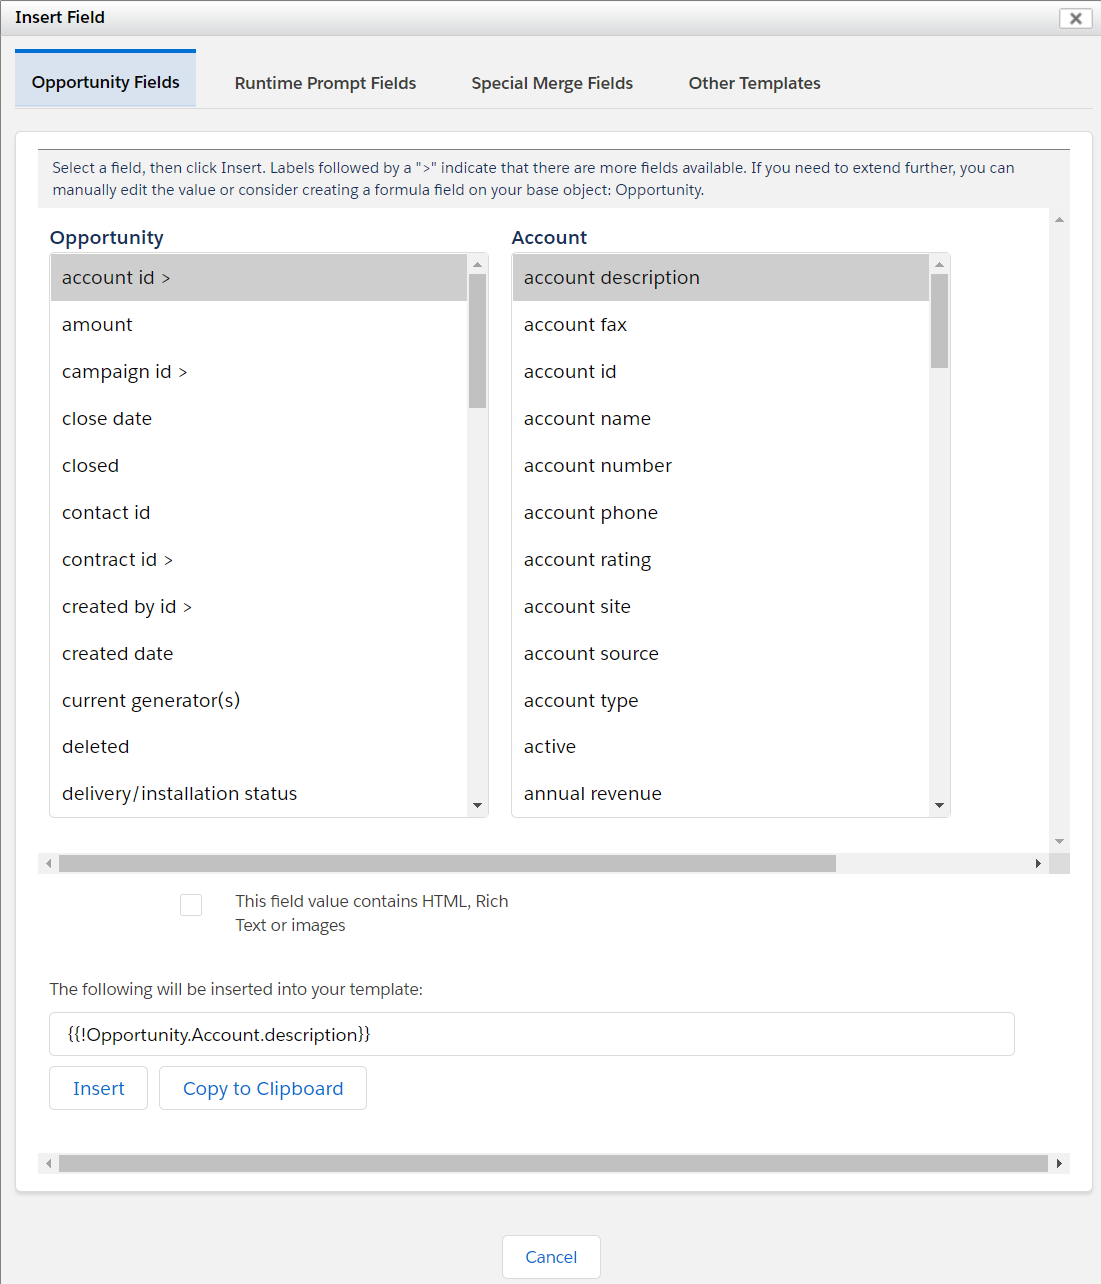
If a field name has a > symbol at the end of it, that means that it's a lookup field for another object. Clicking it will bring up all available fields for that object. You can click lookup fields in that object as well, but you are limited to 5 layers.
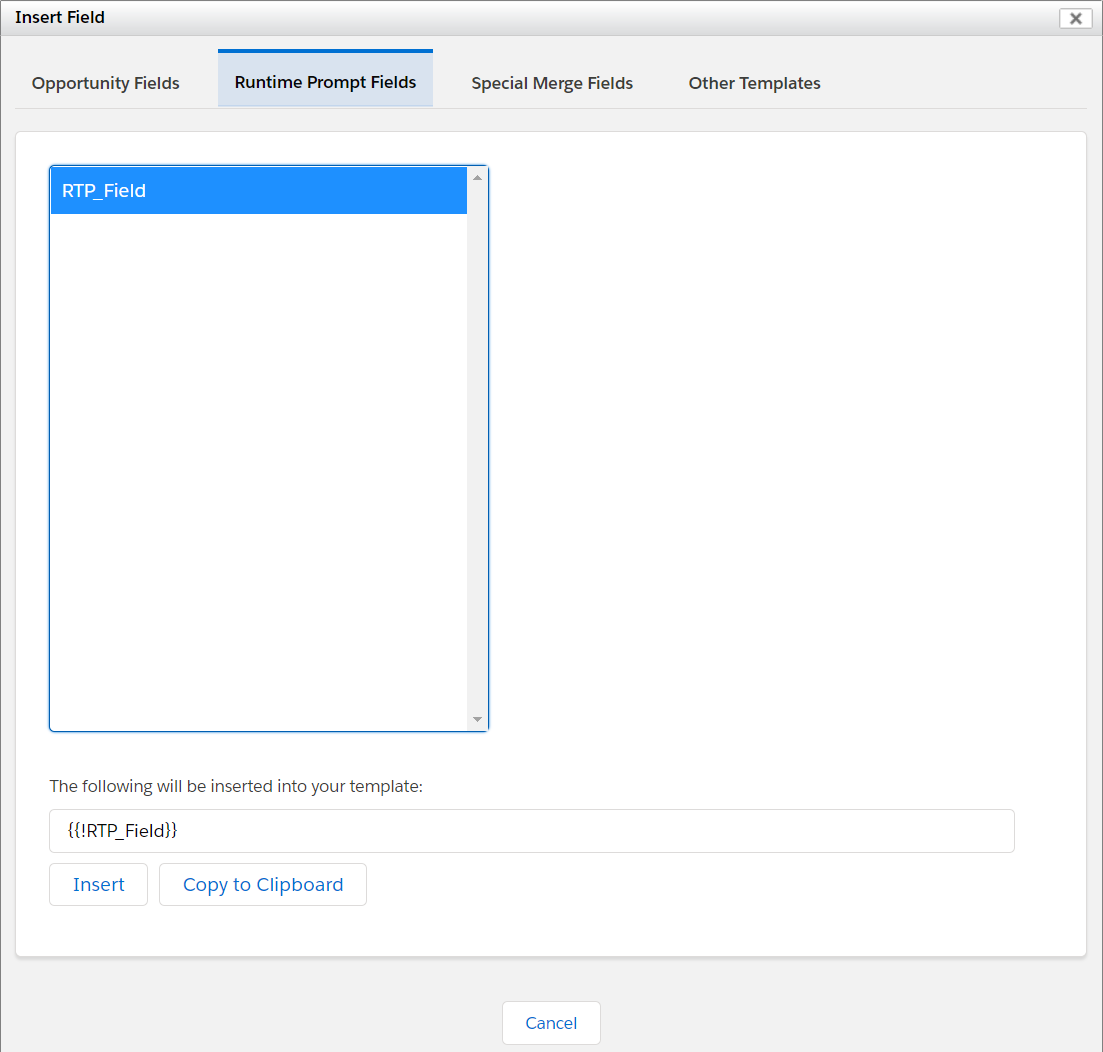
Runtime Prompts Fields
The Runtime Prompt Fields tab will show any runtime prompts that you have defined, and allow you to insert them.
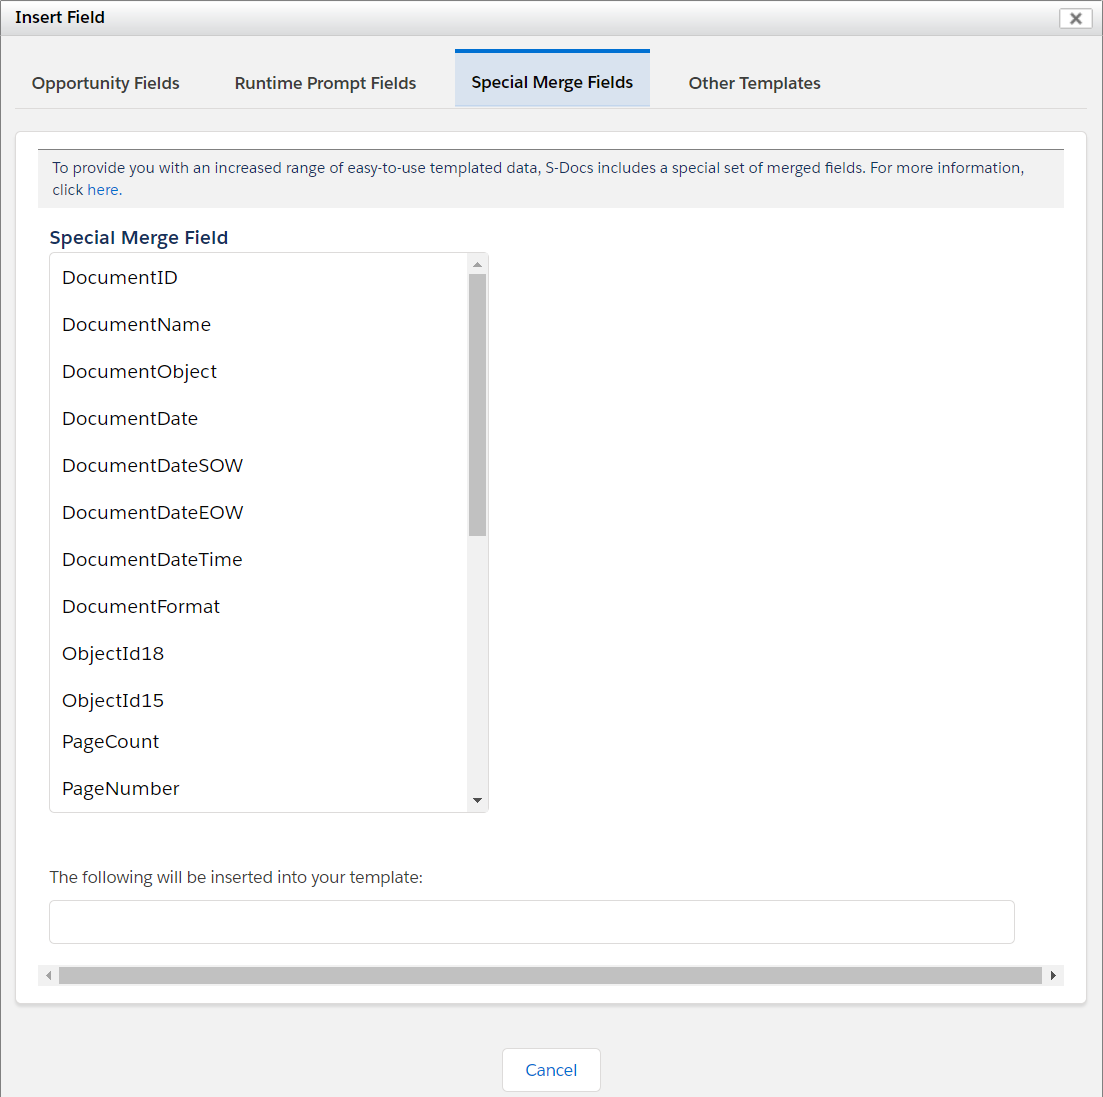
Special Merge Fields
The Special Merge Fields tab shows fields that S-Docs has defined. To view an explanation of each special merge field, click here.
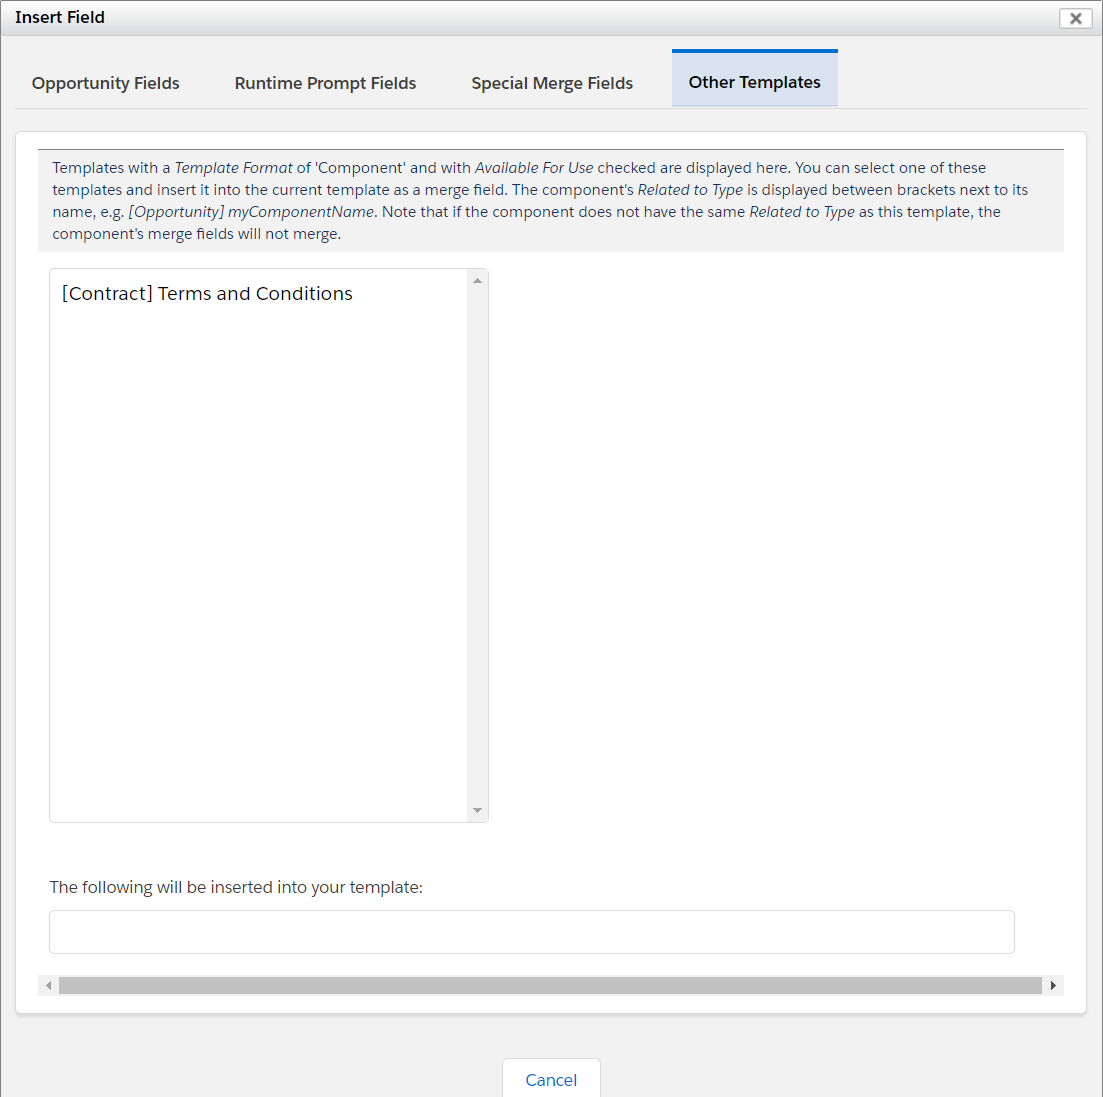
The Other Templates tab will allow you to easily insert one template into another as a merge field. These are called component templates. All available component templates will be listed under this tab in the following format: [Object] Template Name. To learn how to configure templates to be used as merge fields in other templates, click here.
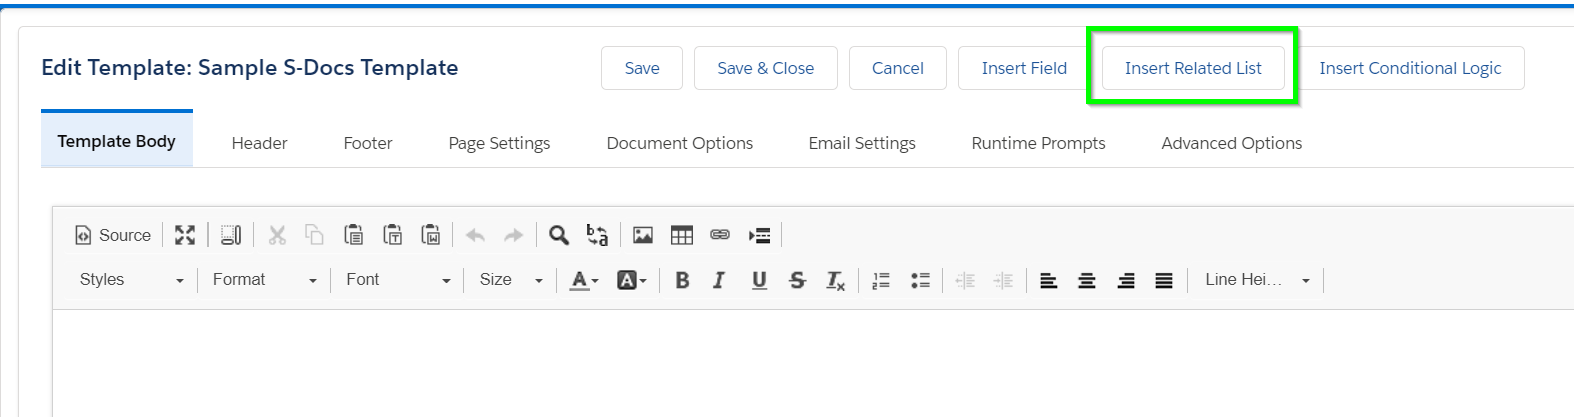
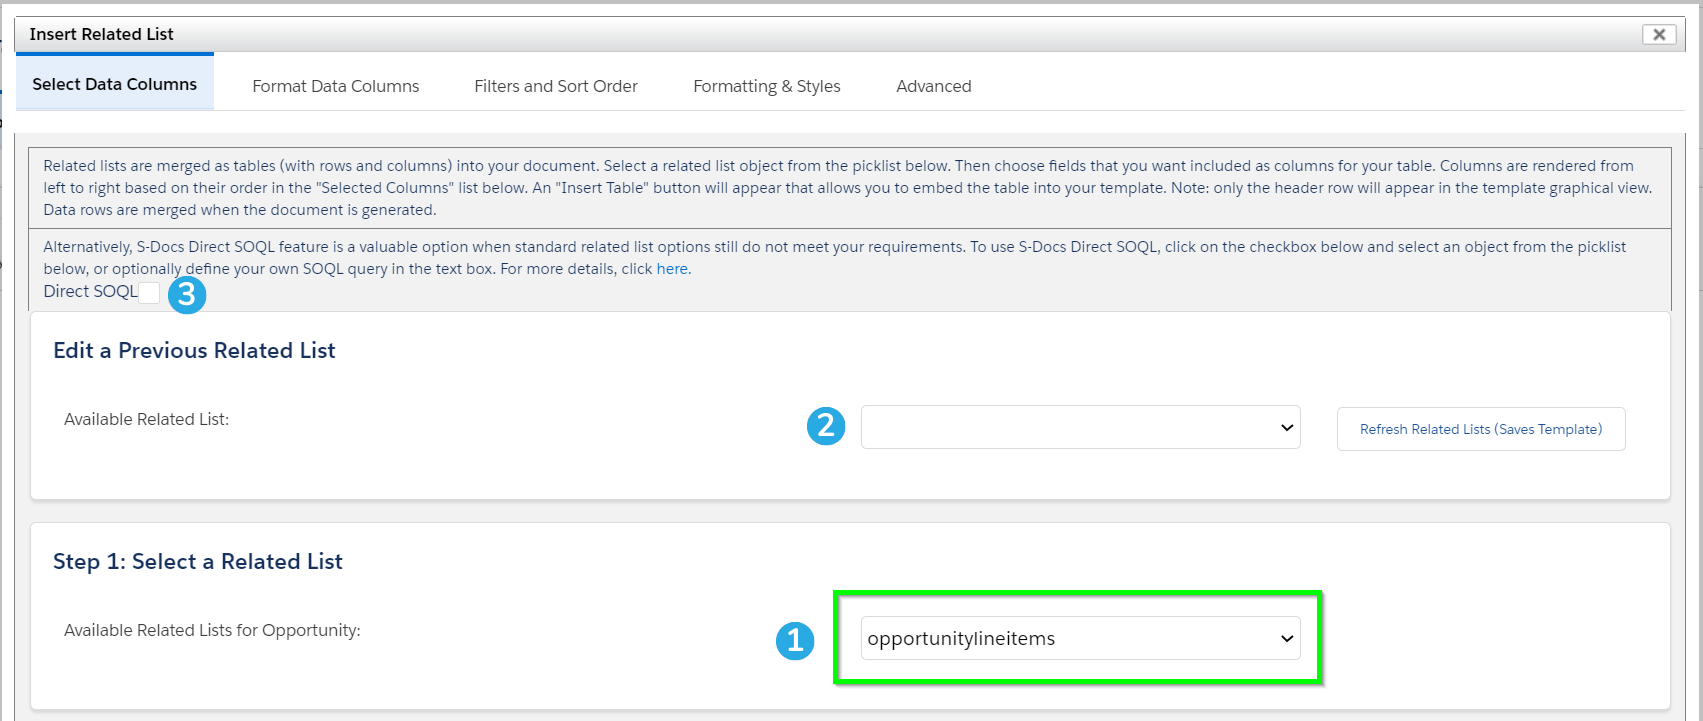
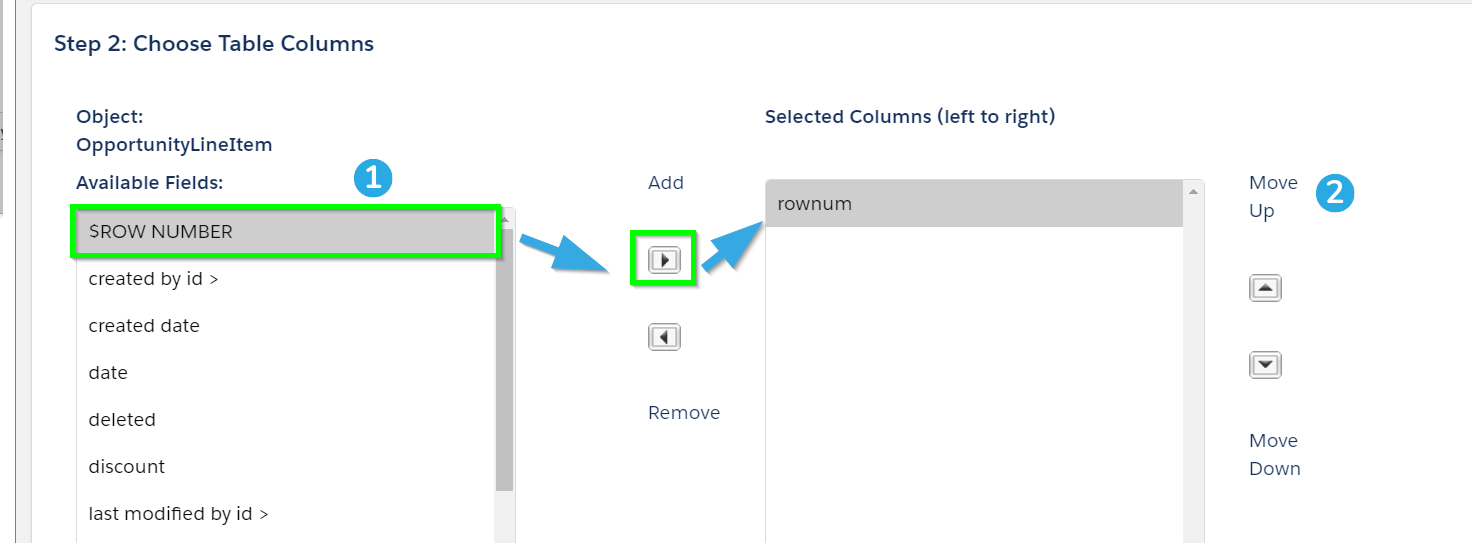
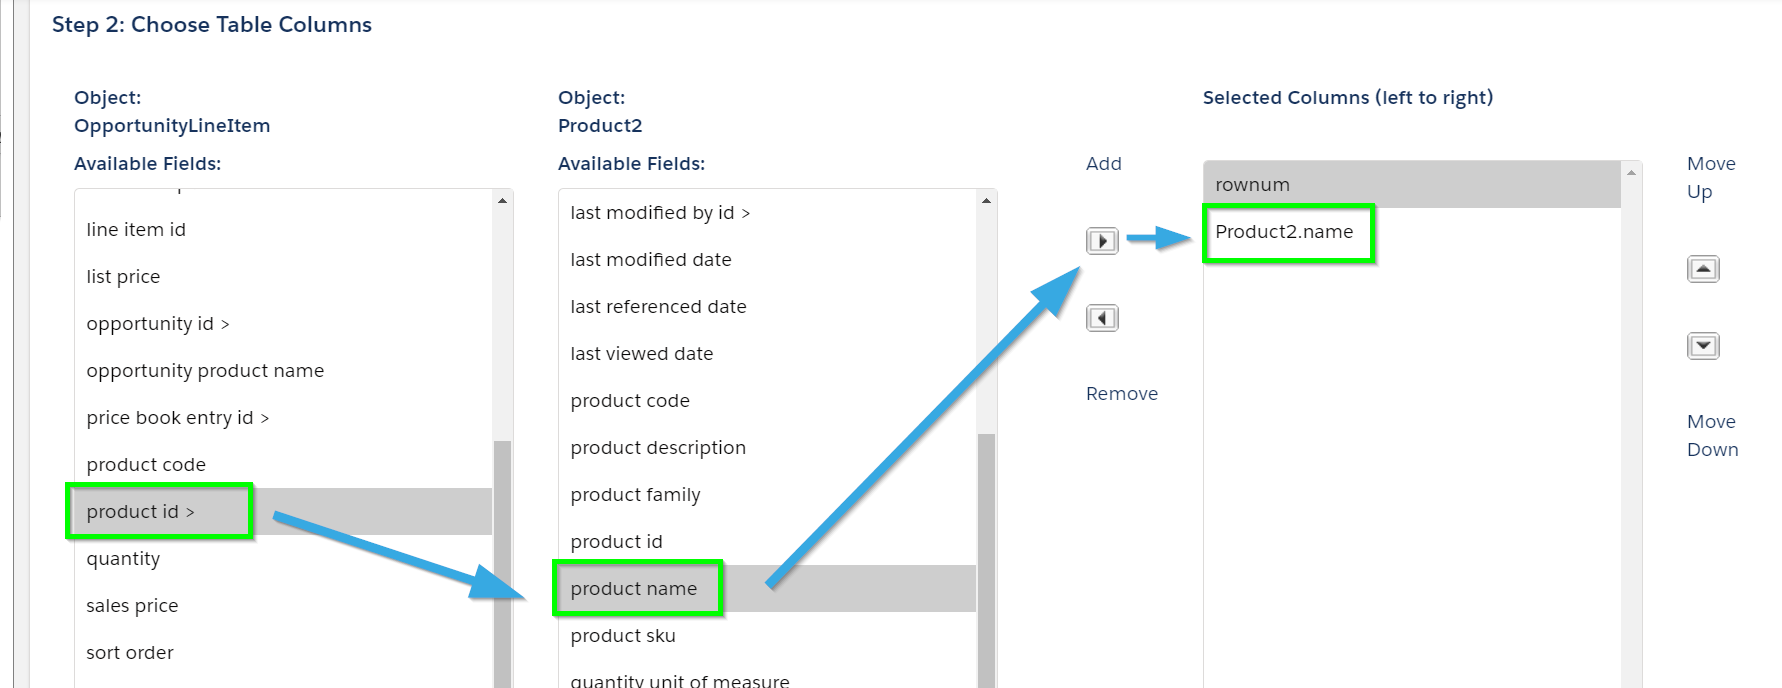
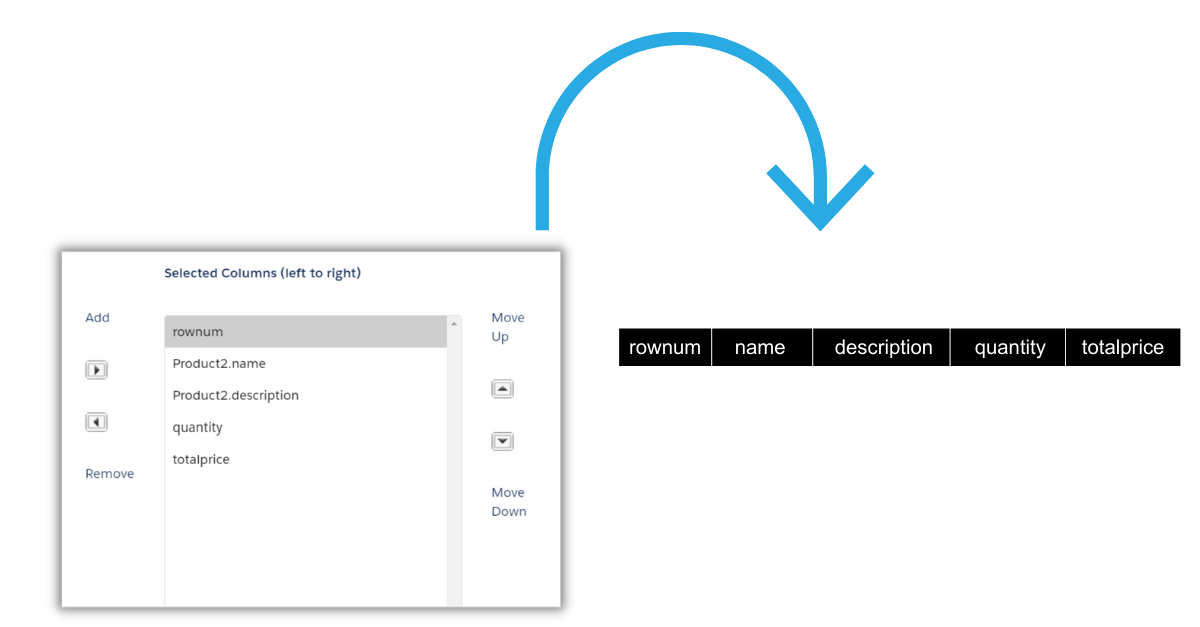
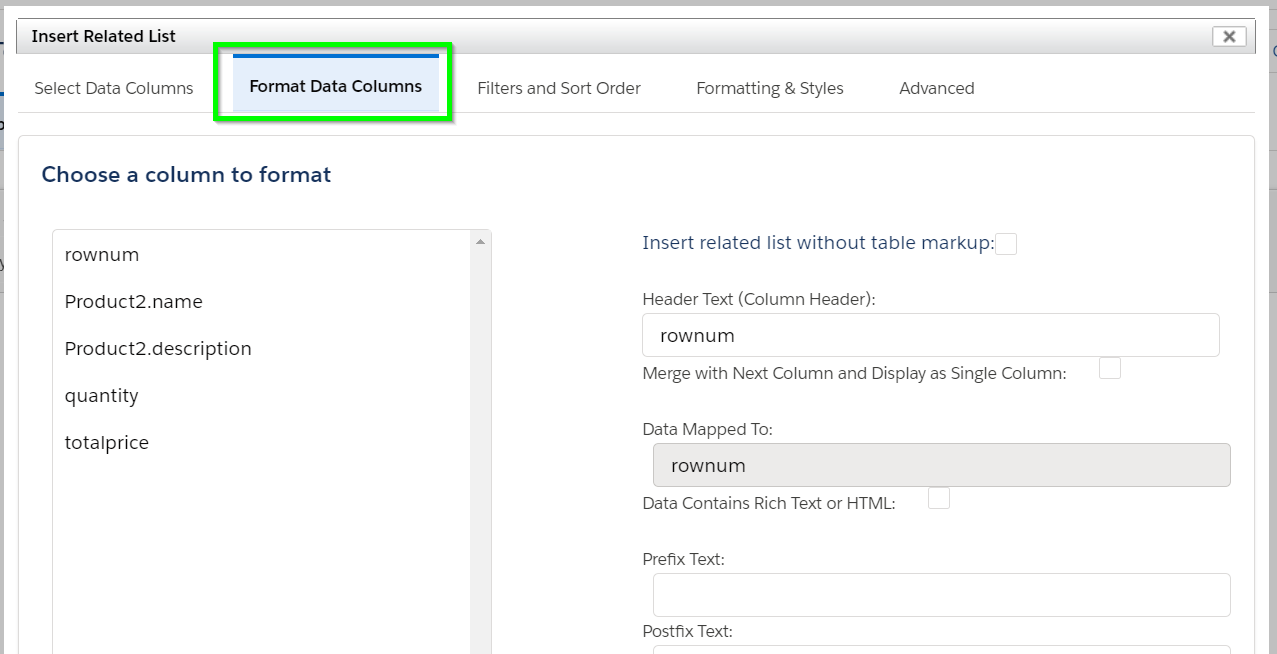
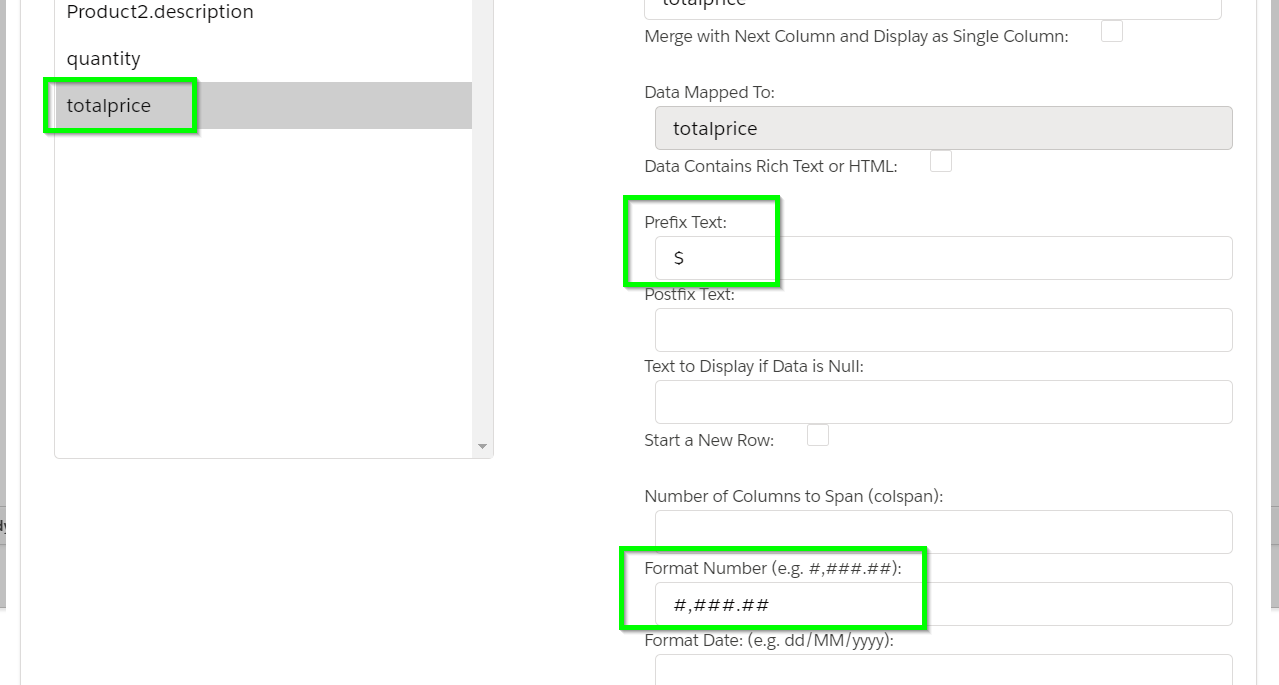
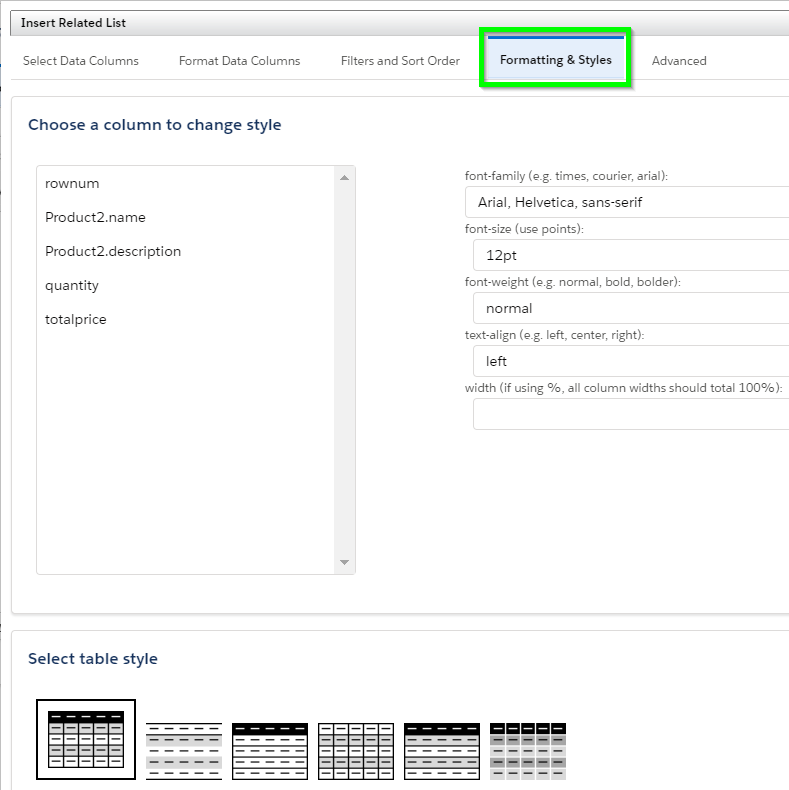
The Insert Related List and Insert Conditional Logic buttons are explained in detail in separate articles.