Introduction
S-Sign requests can be configured to automatically generate and send after any platform-triggering event in Salesforce. For example, when a user changes an opportunity Stage field to Proposal/Price Quote, you can configure S-Sign to generate and send an e-signature request to all of the Opportunity Contact Roles related to that Opportunity. Users would not need to click on any buttons or choose any templates; whenever the field value is changed, even from a mobile device, the process is invoked and the document is sent for signature.
This article will help you configure S-Docs to meet your requirements using the S-Docs Jobs object in conjunction with one of two Salesforce automation options: Process Builder and Apex triggers.
If you'd like to learn more about the S-Docs Job object and the different automation options offered by S-Docs, please visit our automation guide.
Example Use Case
To walk through setting up automation for S-Sign, we will be using the following example use case:
Whenever the custom checkbox field Send Renewal Agreement is checked on an Account record, S-Sign will automatically generate and send a renewal agreement PDF for signature to all Contacts related to that Account.

This article will demonstrate how to accomplish this using S-Docs Jobs in conjunction with Process Builder and Apex triggers. Both automation options will utilize the following 5 fields on the S-Docs Job object.
Fields for Our Use Case
| Field | Description |
| Start Job(SDOC__Start__c) | This field will invoke the S-Doc Job so that the documents included in the S-Sign request can generate. It will be set to ‘true’. |
| Doclist(SDOC__Doclist__c) | This is the comma-delimited list of S-Docs template names that we will be using to generate our documents. Make sure there aren’t any spaces separating each template in your comma-delimited list. In our example use case, Renewal Contract is the name of our S-Sign PDF template, and Email Template is the name of our S-Sign HTML email template. Thus, we will be using the following Doclist for our example use case:Renewal Contract,Email Template |
| Object ID(SDOC__Oid__c) | This is the Object ID field, i.e. the place where we specify which object our Process/Apex Trigger should pull record IDs from. In our example, we will choose Account, since we want our process to use Account record IDs. |
| Object API Name(SDOC__ObjAPIName__c) | This is the API name of our object. It will be set to Account. |
| Send Email(SDOC__SendEmail__c) | This field will automatically email the S-Sign request. It will be set to '1.' If this field was set to '0,' the S-Sign request would not be emailed.For this to work properly, our Doclist needs to include an S-Sign enabled HTML email template. |
Automate S-Sign with Process Builder
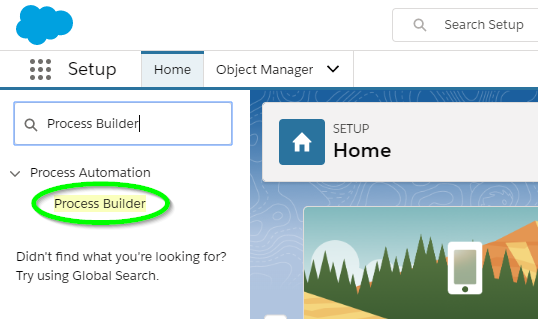
Process Builder is the easiest option for automating S-Sign requests. To begin, navigate to the Setup menu, type "Process Builder" into the Quick Find bar, and click Process Builder.
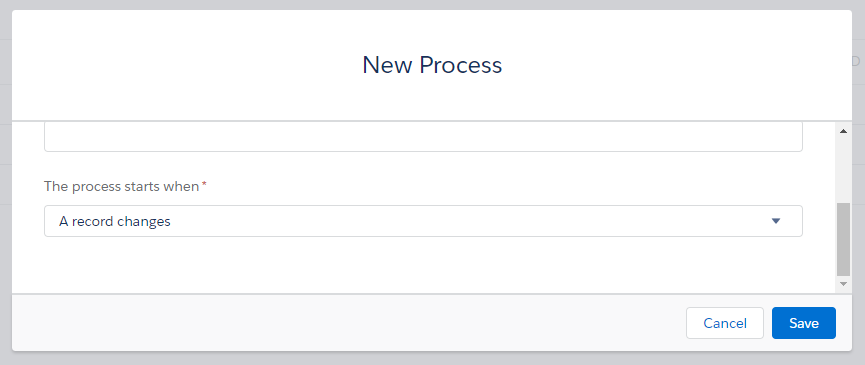
Click New in the top right corner to create a new process.

You can name the process whatever you'd like, then choose to start the process when a record changes. Click Save.
Click Add Object, choose Account, and start the process when a record is created or edited, since our process will be invoked when our custom checkbox field is checked. Then, click Save.

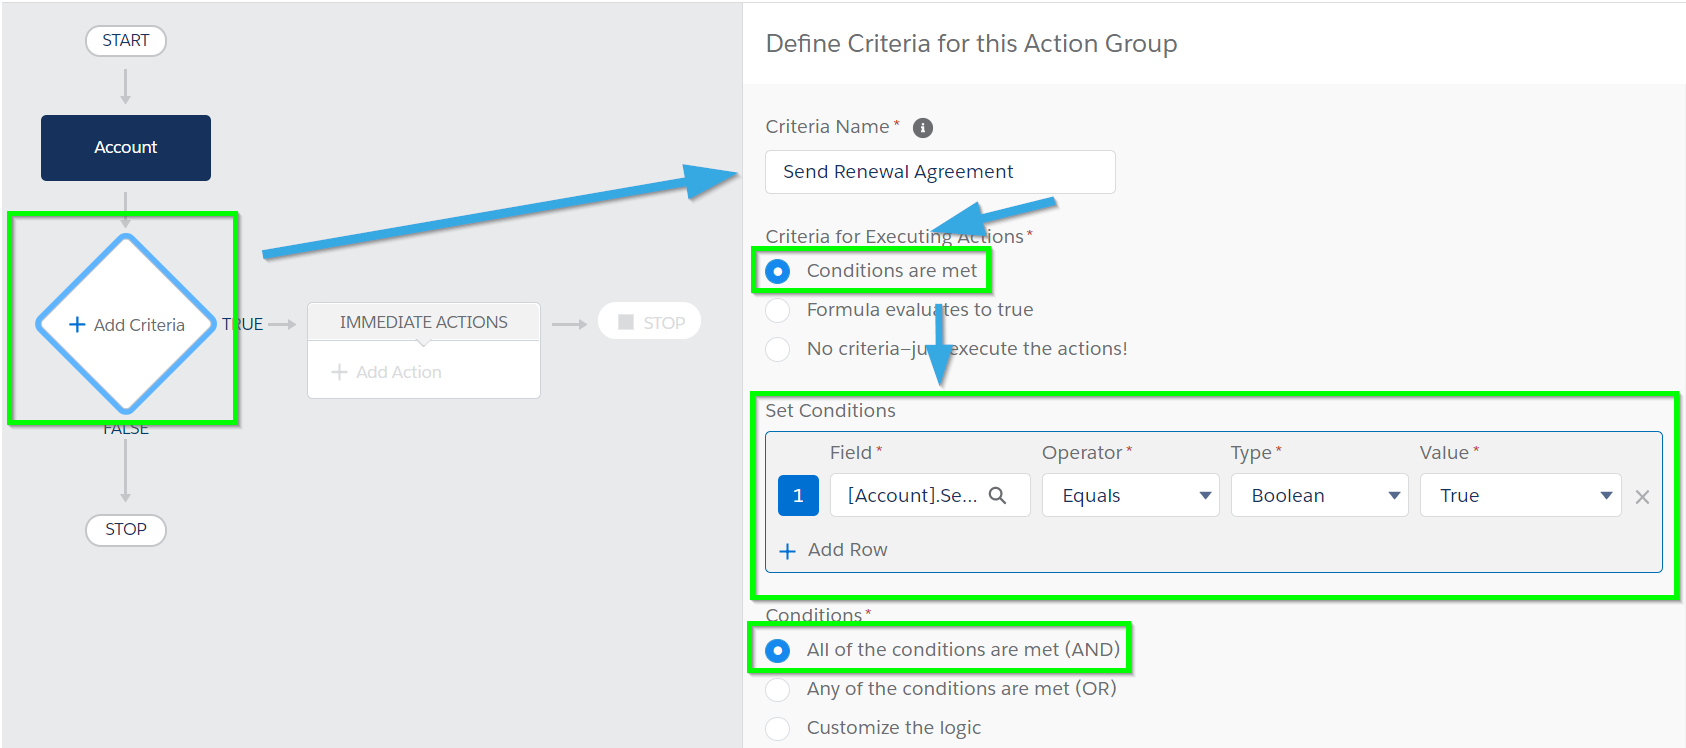
Next, click Add Criteria. Choose a name and select Conditions are met. Next, set the conditions -- in our case, we'll select the Send Renewal Agreement field, set the Operator to Equals, keep the Type set to Boolean (since it's a checkbox field) and set the Value to True. Finally, we'll choose to invoke the process when All of the conditions are met (AND). This will ensure that the process is invoked whenever the Send Renewal Agreement checkbox is checked. Click Save.
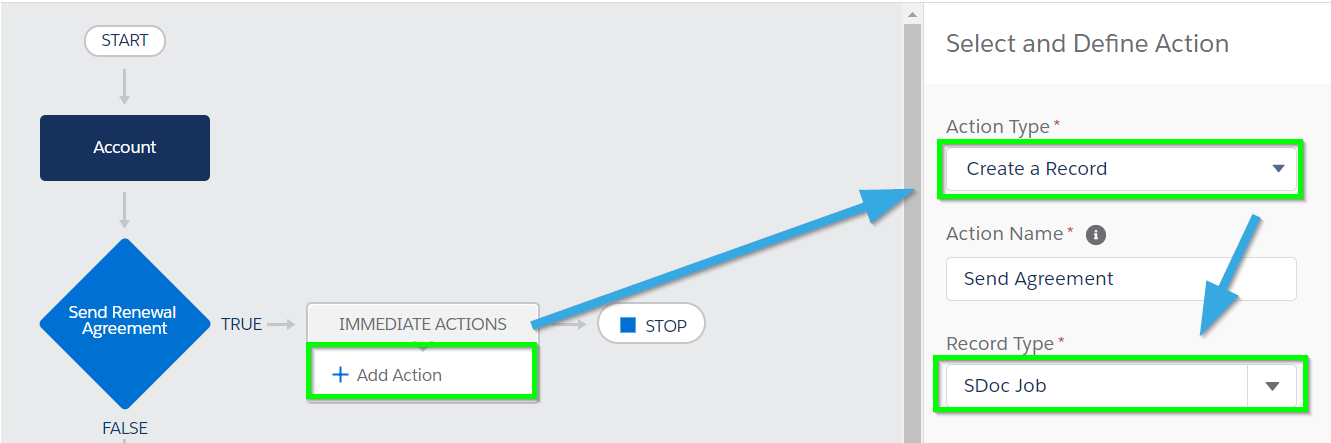
Then, click Add Action (under the Immediate Actions section). Choose Create a Record for the Action Type, enter an action name, and select SDoc Job for the Record Type. You may need to type it in to find it.
A Field Values menu will appear below. This is where you will add the five fields described in the Fields For Our Use Case table above. Click Add Row to add each new field.
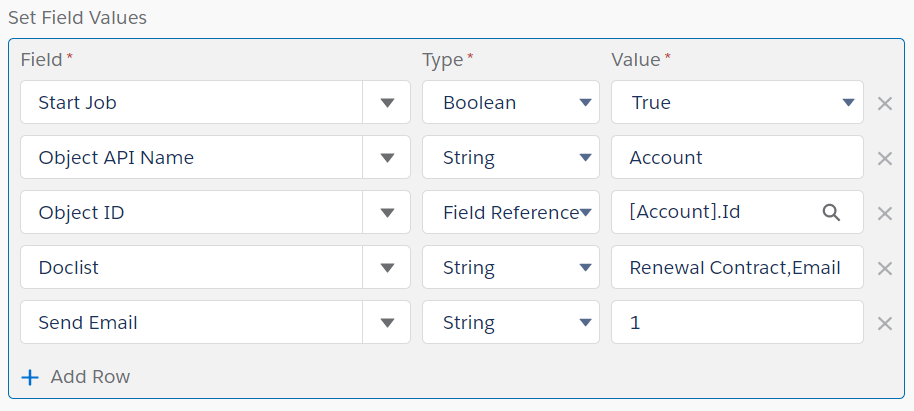
Click Save when you finish adding each field. Your process should look similar to this:

Click Activate at the top right to activate your process. S-Sign will now automatically generate and send a renewal agreement to all Contacts related to your Account whenever the Send Renewal Agreement checkbox is checked.
Automate S-Sign with Apex Triggers
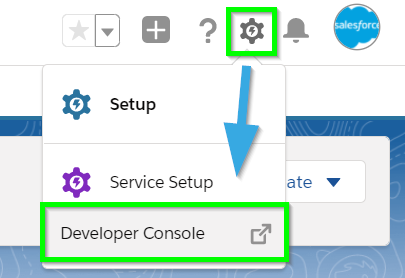
To automate S-Sign requests using Apex triggers, begin by navigating to the Developer Console (click the Cog in the upper right corner and select Developer Console).
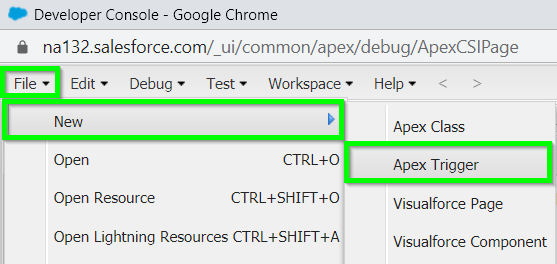
Create a new trigger (File > New > Apex Trigger).
Name the trigger whatever you'd like, and select Account for the sObject.

Delete the text that was automatically inserted, and paste in the following trigger:
trigger RenewalAgreement on Account (after update) {
  List<SDOC__SDJob__c> jobList = new List<SDOC__SDJob__c> {};
  for (Account acct : Trigger.new) {
    Account oldacct = Trigger.oldMap.get(acct.Id);
            If (acct.Send_Renewal_Agreement__c == True){
    SDOC__SDJob__c job =
    new SDOC__SDJob__c(SDOC__Start__c=true,
                      SDOC__Oid__c=acct.Id,
                      SDOC__ObjApiName__c='Account',
                      SDOC__SendEmail__c='1',
                      SDOC__Doclist__c='Renewal Contract,Email Template');
    jobList.add(job);
  }
  insert jobList;
}
}
Once you click Save, S-Sign will automatically generate and send a renewal agreement to all Contacts related to your Account whenever the Send Renewal Agreement checkbox is checked.
While this article detailed how to automate S-Sign to satisfy the requirements of a simple use case, you can combine these examples with much larger, more complex processes or triggers to meet any unique business requirement. To learn more about automating S-Docs, please visit our general automation guide, as well as our guide to generating S-Docs with one or zero clicks.
Tags: Automation, S-Docs Jobs