Introduction
It's often necessary to include data from a record's related lists in your documents. In the template editor, S-Docs includes a powerful, easy-to-use related list generator just for this purpose.
For example, if you have a template from an opportunity, you can insert a related list that will display certain fields from an opportunity's child quote records. The S-Docs related list generator provides a complete range of flexibility in developing templated related lists. For example, without even editing any code, you can adjust the formatting of the related list's table and columns, select any of the related list object's fields that you would like displayed in your table, and even filter/sort the related list rows by user-specified criteria. If you decide to go one step further and edit the related list source code, the possibilities for modification become endless.
This guide will discuss how you can use the S-Docs template editor to create a table with columns comprised of related list fields. In the following steps, we will be creating a very basic related list that might generate the following document:

The document above was generated from a template for an opportunity. In this template, we inserted a related list for an opportunity’s child quote records. You can find a list of more advanced related list column attributes in our Advanced Template Features document.
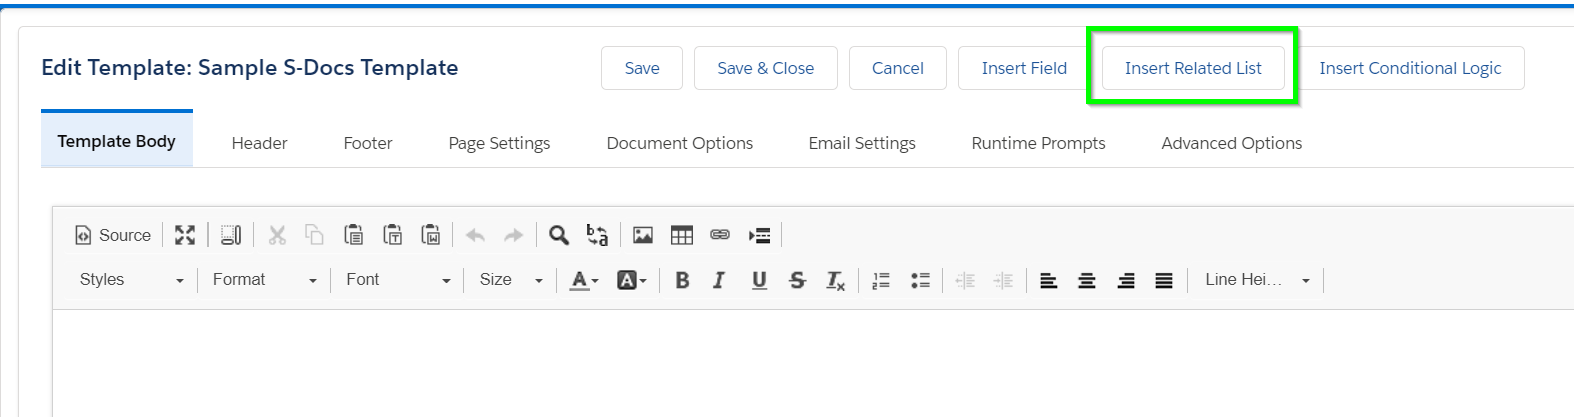
Use The "Insert Related List" Button
Now, let's begin! In the template editor for our opportunity template, start by clicking the Insert Related List button at the top of the page.
Select A Related List
The following window will appear.
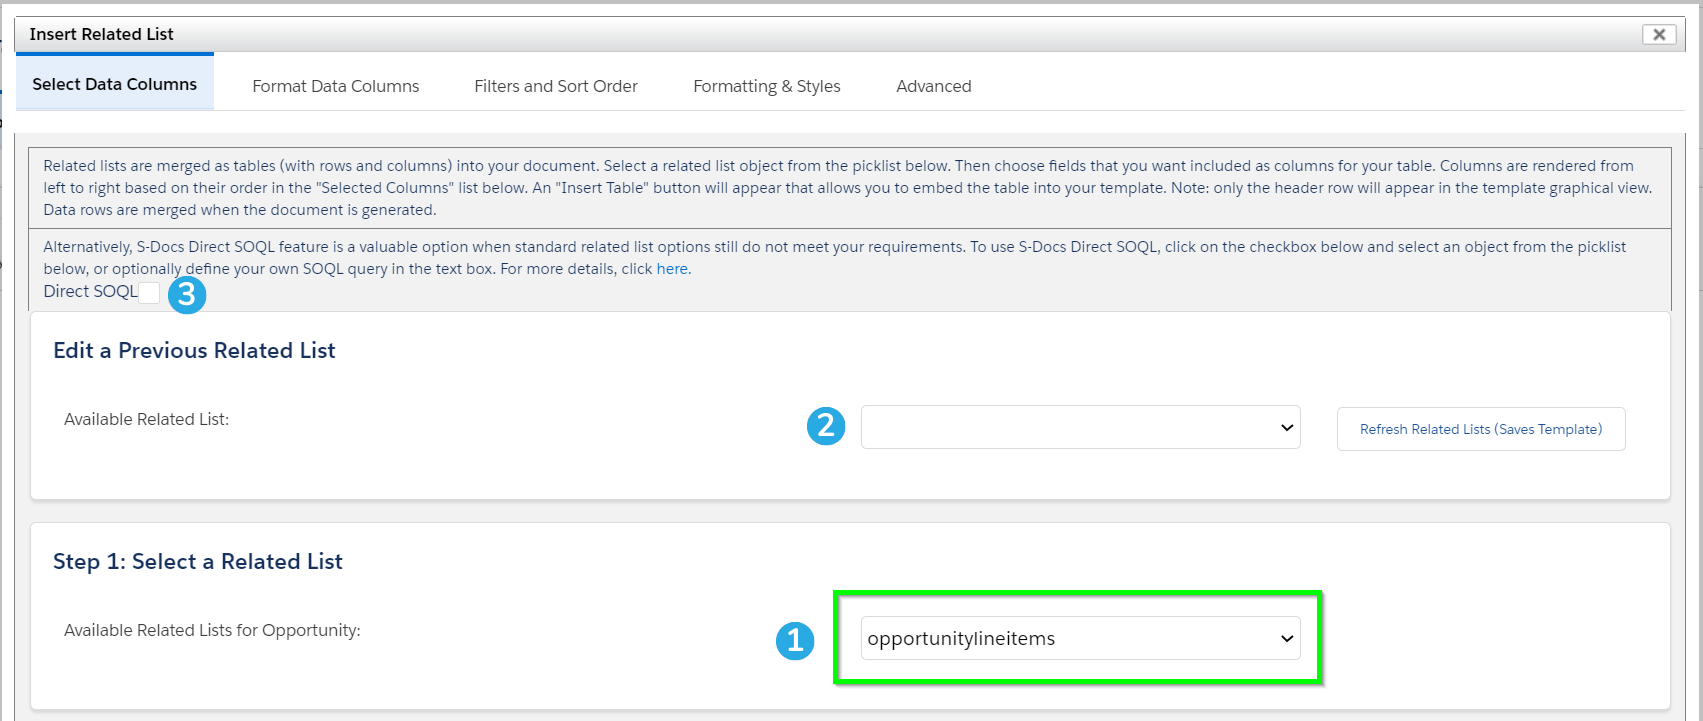
[1] The drop-down menu under “Step 1: Select a Related List” allows you to select an available related list for your object. In this case, we selected the opportunitylineitems related list. You can also [2] choose to edit a related list that you've configured in this template before, if applicable.
In addition, [3] you're given the option to utilize the S-Docs Direct SOQL feature, which allows you to merge records from objects that aren't related to your base object, and much more. Find out more about the Direct SOQL feature in this documentation article.
Choose Table Columns
Scroll down to Step 2: Choose Table Columns to select fields from your related list object to be used as columns in the related list table.
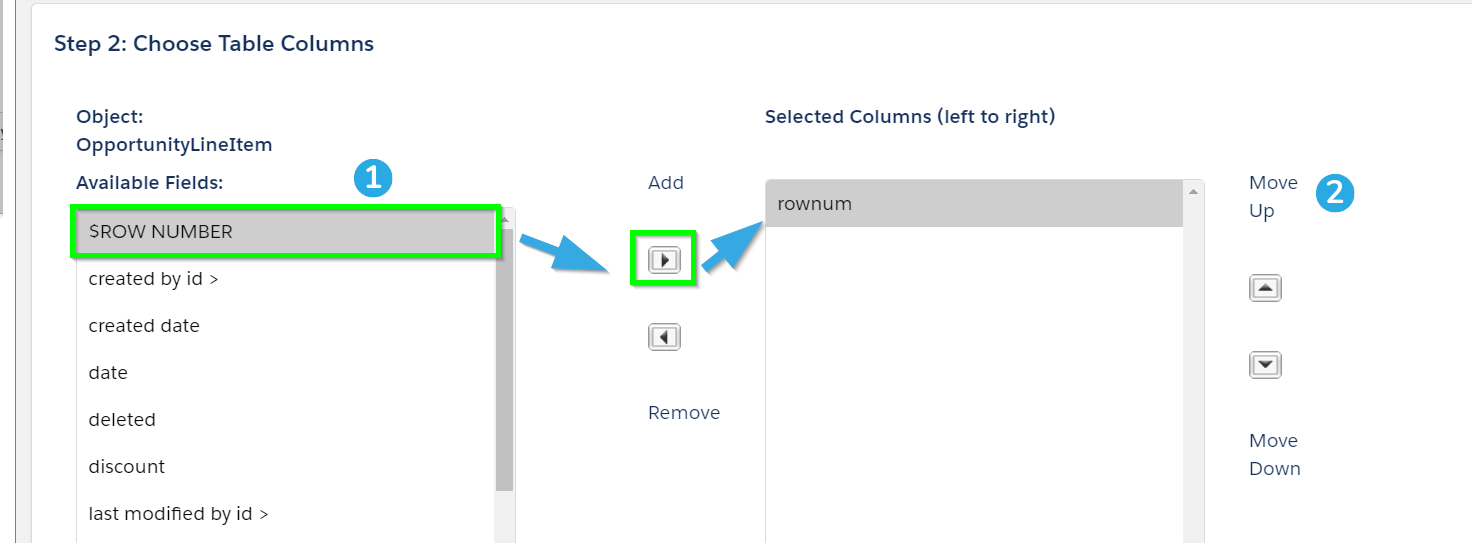
To add a field as a column in your table, [1] click the name of that field and then click the button under “Add.” The topmost field will become the leftmost table column, but you can [2] rearrange the fields as necessary on this screen.
Note that some fields have this character to the right of them: “>.” These fields correspond to IDs of object records in our related list; clicking on them will bring up another menu where we can pull data from these object records.
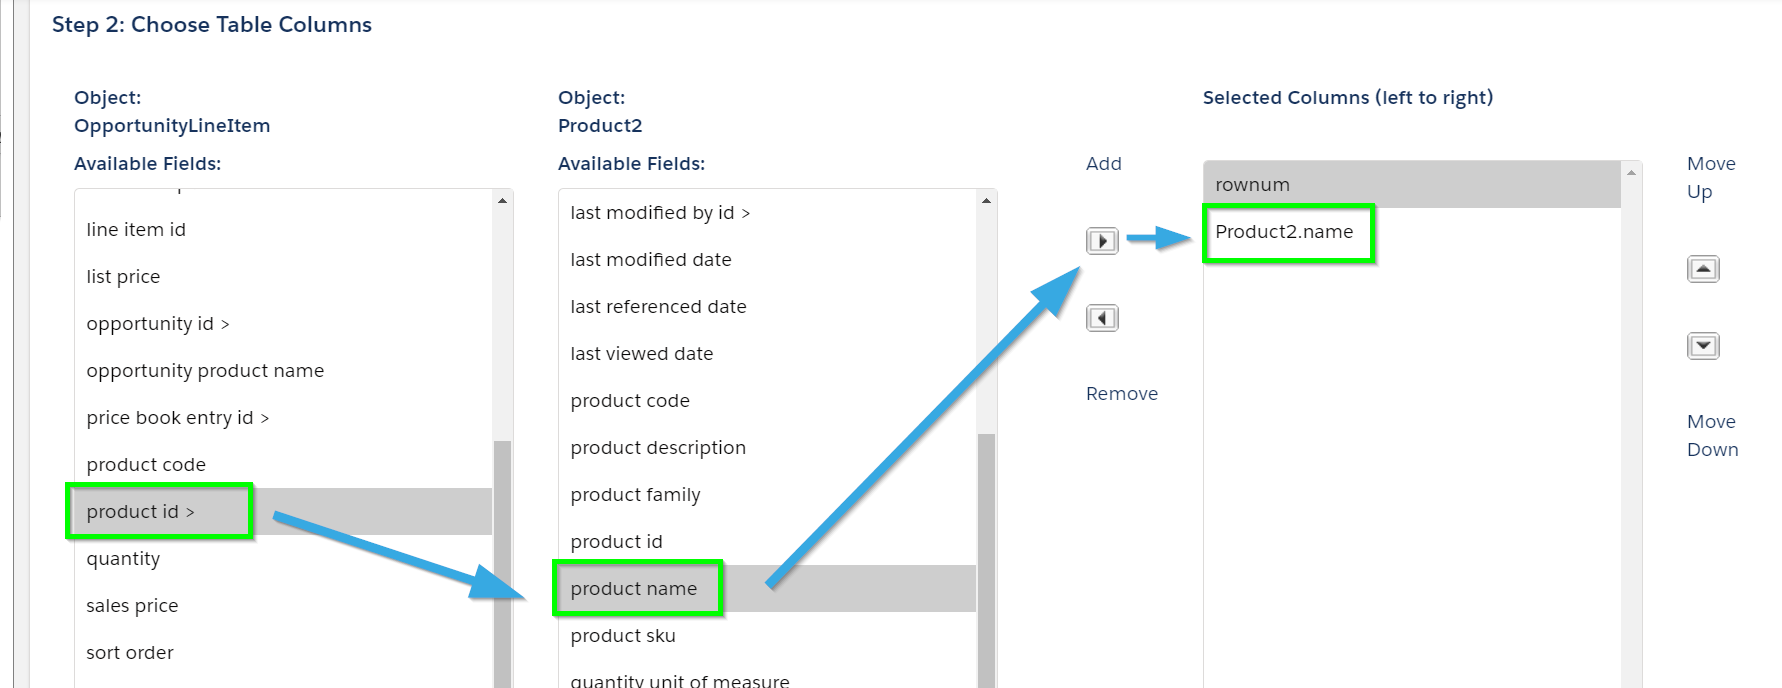
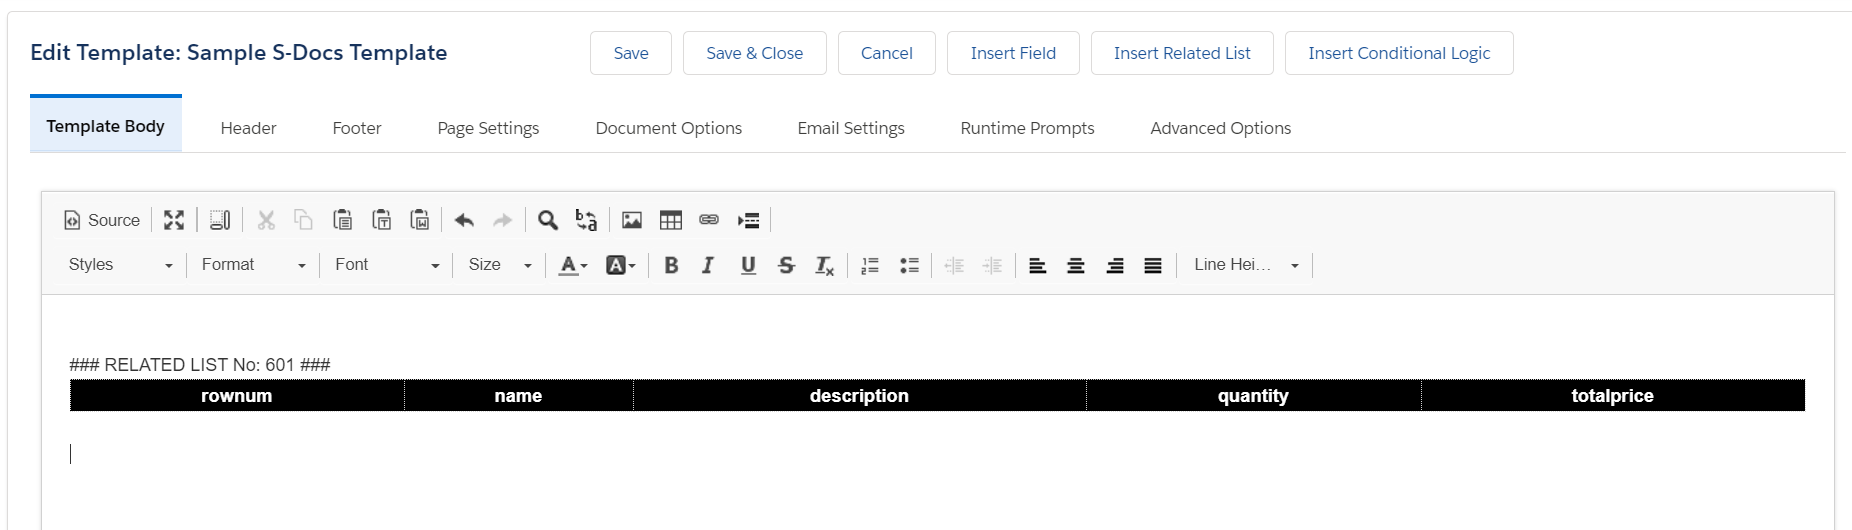
After choosing the following fields, our related list columns would appear as follows:
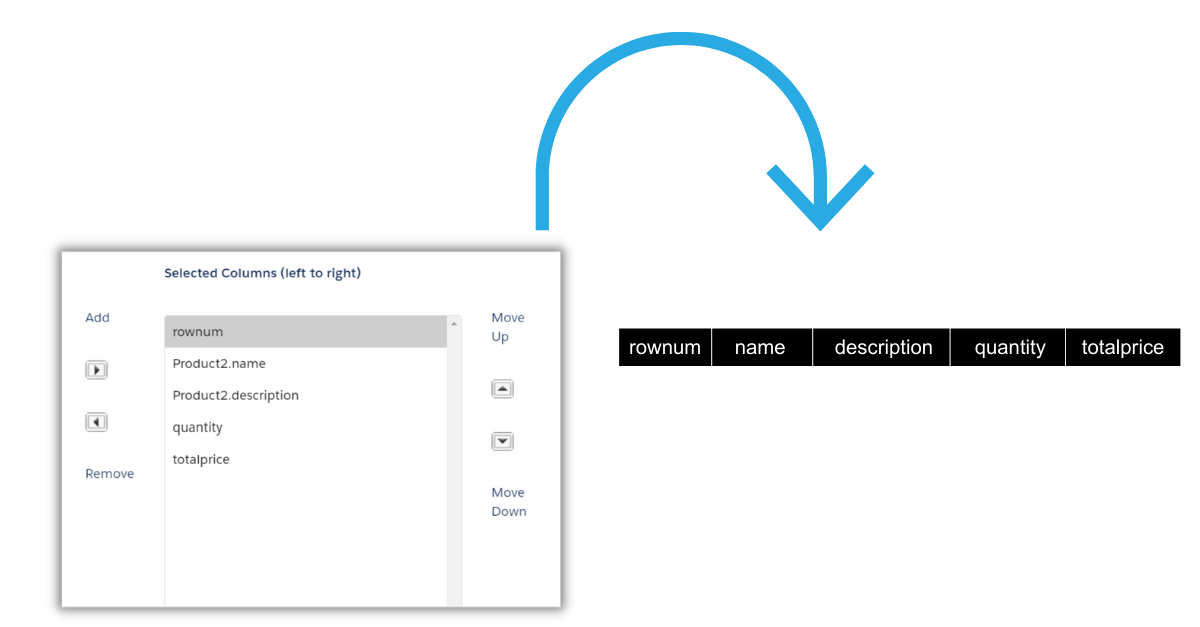
This simple related list would output a numbered list of products related to this Opportunity, including product names, descriptions, quantities, and total prices.
Format Table Columns
After selecting all the columns you’d like to have in your related list, open the Format Data Columns tab.
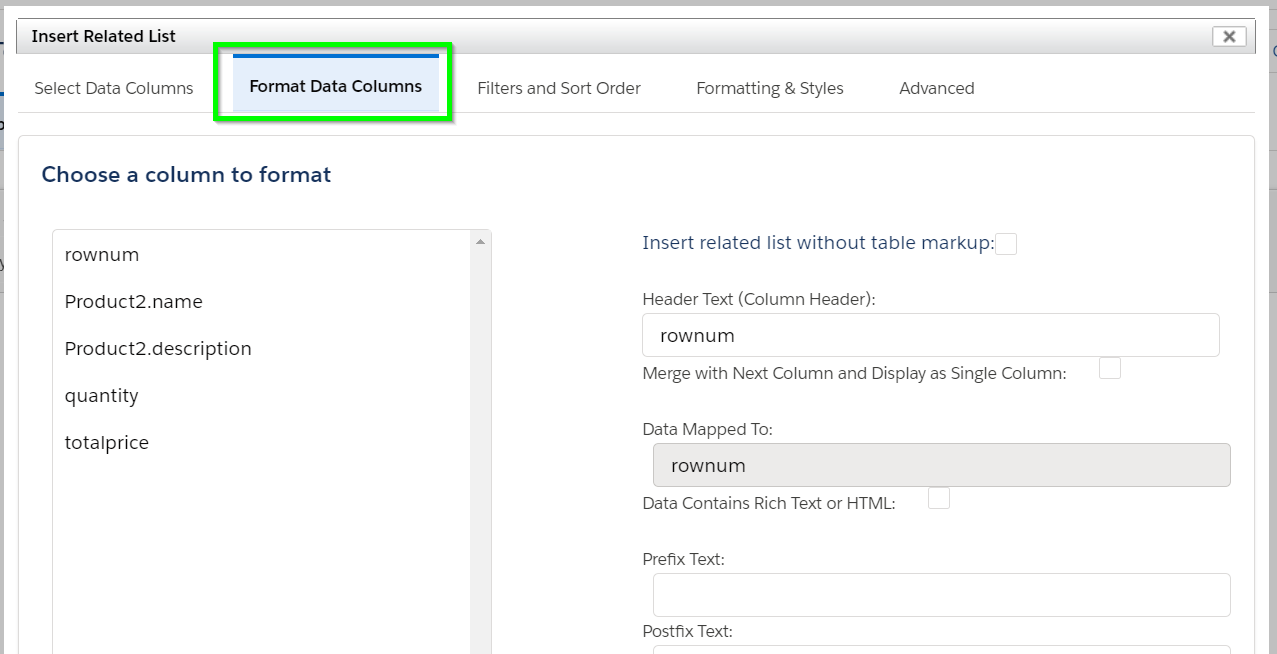
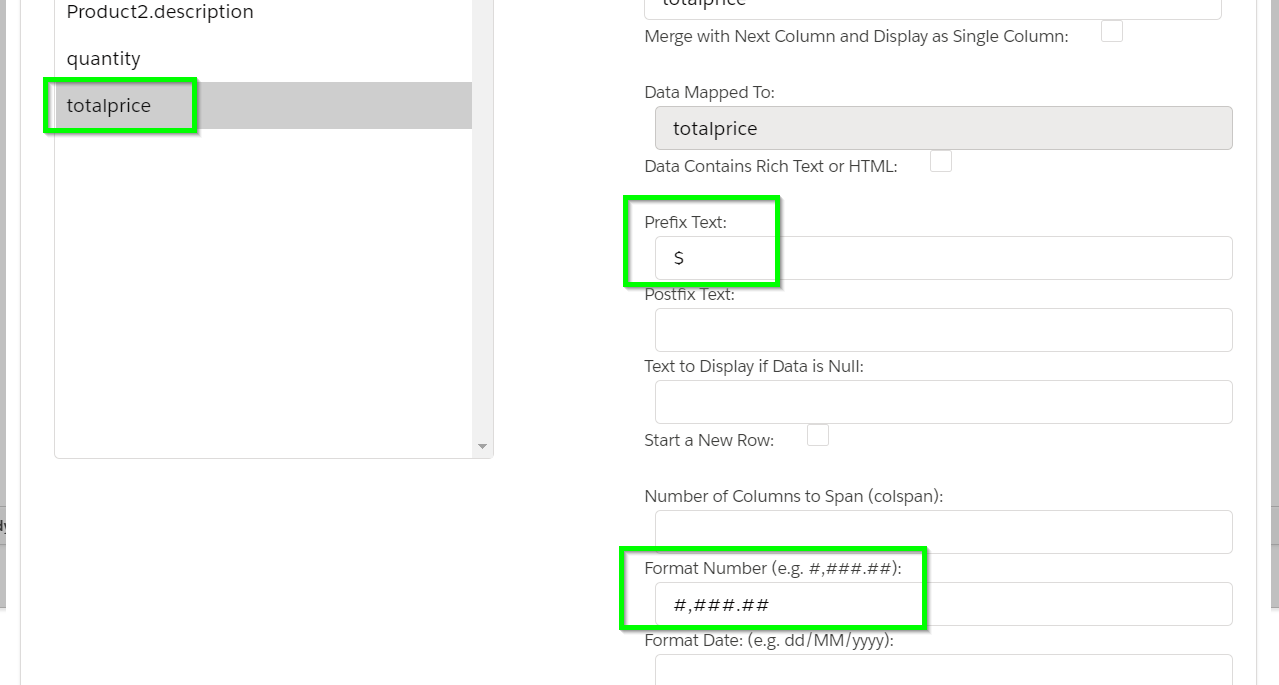
Here, you can edit how each column will appear. By default, the current columns would be named “rownum,” “name,” "description," "quantity," and "totalprice." You can change these names under Header Text (Column Header). The other fields offer useful formatting options for each entry under the selected column. For the “totalprice” column in our example, we set the prefix text to “$” and the format number to #,###.## so that price entries will be formatted as currency.
Additional Table Formatting & Styles
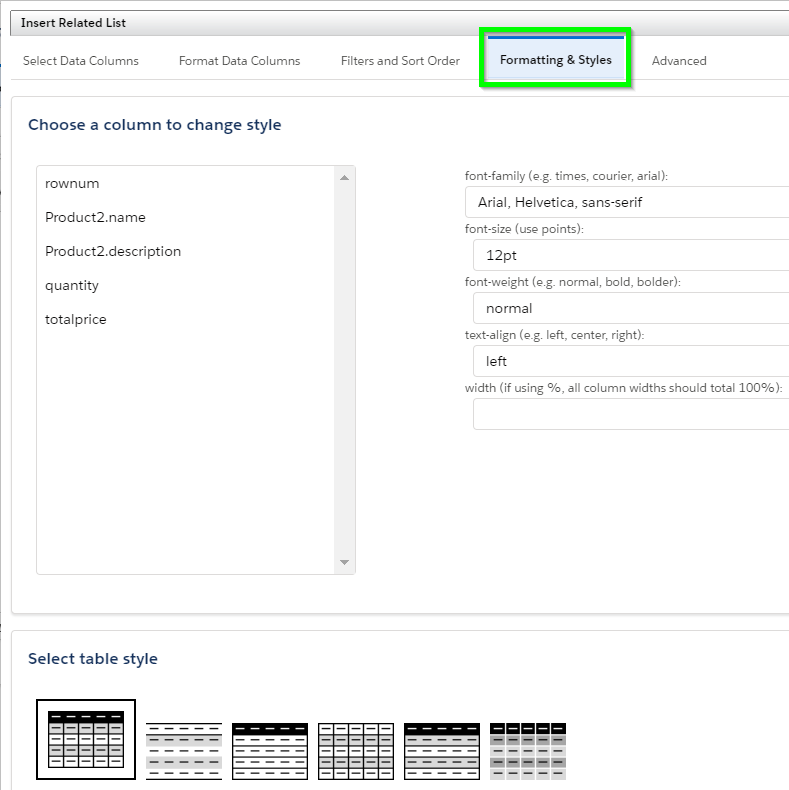
After formatting your columns, click Formatting & Styles to apply even more formatting to your table. You can change the table style as a whole as well as change the formatting of the text in each individual column.
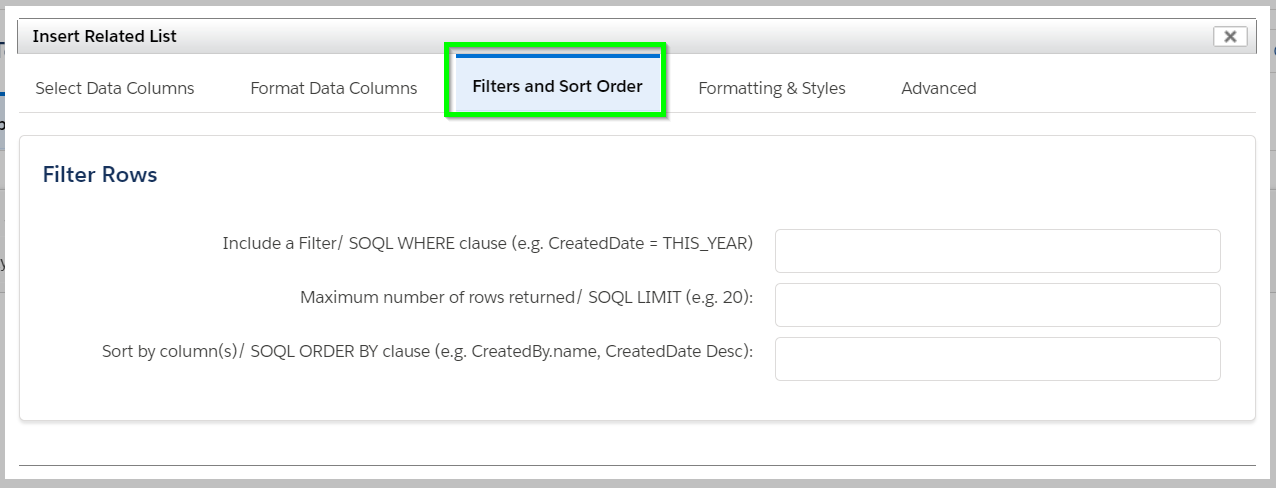
Filter & Change Row Order
You can also filter out rows and change the order in which the rows are sorted using SOQL and filter logic by accessing the Filters and Sort Order tab. Examples of filter logic are included under the description for each field in this tab: for example, using “Quantity > 1” in the first field would make our table only output products that have a quantity greater than 1. The other two fields allow us to limit the number of rows created in our table, and to sort our rows by filter logic or SOQL ORDER BY clauses.
Edit Source Code
Finally, view the Advanced tab to see the source code generated for the table you have been creating. You may edit the source here before inserting the table if you wish to fine tune your table’s qualities (you can also edit your related list in the template editor's source mode after inserting your related list). You can edit the CSS here in order to fine-tune the formatting of your table (e.g. border-width, font-size, the background color of even rows, etc.). If you'd like more control over your related list's layout, you can customize your related list code; extensive documentation on this can be found here.

Insert Your Related List
Click Insert to insert the table into your template.
Note that there is no data or fields present under the columns, as this is a template. The table will populate as expected upon document generation. If you wish to edit your table after insertion (such as adding and deleting certain fields it uses as columns), you can click Insert Related List again and select your related list under the Edit a Previous Related List section.
You may also edit it in the source editor. That's it! You are now ready to use related lists in your templates.
Tags: Filters, Related List, Template Editor