Introduction
This document will teach you how to configure S-Docs and generate your first documents with the Salesforce mobile app. Once you set up S-Docs for the Salesforce mobile app, you will be able to access the full features & functionality of S-Docs just as you can on a desktop. However, it may be beneficial for mobile clients to streamline document generation on the go. If your users typically create a few documents in the field, such as quotes or service orders, you may want to consider using the S-Docs automation features to simplify the process. This would remove the need to place an S-Docs button on the Salesforce mobile app and reduce the number of taps and potential errors or omissions.
For example, you can add a picklist on your mobile page layout with the following values: Email Quote, Email Service Order. When the user selects that value and saves the Salesforce record, an S-Doc is automatically generated and emailed from the Salesforce cloud. The user does not need to do anything else. This process can be configured without writing any code by using the Salesforce Process Builder. See the documentation here.
If you would like to leverage the full features and functionality of S-Docs on the Salesforce mobile app, it is described in this document.
Note: As of Spring '17, only S-Docs Templates with Auto-create File checked (found in the "Document Options" tab of the Template Editor) can be reliably viewed across all devices.* In the Salesforce mobile app, S-Docs Templates with Auto-create File unchecked can still be generated, emailed, etc. as usual, but cannot be reliably viewed across all mobile devices in mobile browsers or the Salesforce mobile app.
*This is because, as of Spring '17, only Salesforce Files can be reliably viewed on all devices in the Salesforce mobile app - the same may not hold true for Salesforce Attachments or other document rendering methods in Salesforce. Checking "Auto-create File" on your template will create a Salesforce File when you generate an S-Doc, so this will ensure that your document can be reliably viewed across all mobile devices in the Salesforce mobile app.
Preview: Generating Documents on the Salesforce Mobile App
Before we see to configure S-Docs for use with the Salesforce mobile app, we will first see the feature in action.
1. Select the object you created the button for.

2. Select any record from this object. At the bottom of that record’s page, tap Show More.

3. Scroll down and tap S-Docs Mobile.

4. Use S-Docs to generate documents just as you would on a desktop. It’s that simple!

We will now discuss how to set up S-Docs for use with a particular object in the Salesforce mobile app.
Step 1: Create the S-Docs Mobile button
1. Create a new S-Docs Mobile button for a particular object. For standard objects, please follow the instructions in part (a). For custom objects, please follow the instructions in part (b).
a) Creating the Button For A Standard Object
If you are creating this button for a standard object, navigate to the Setup menu, type the name of the object into the Quick Find / Search bar, and click Buttons, Links, and Actions from the options that drop down under your object name.

Then, click New Button or Link.

This concludes part (a).
b) Creating the Button For A Custom Object
If you are creating this button for a custom object, navigate to the Setup menu, type "Objects" into the Quick Find / Search bar, then click Objects from the options that drop down under Create.

Then, click the name of your object (not the Edit button).

After you click the name of your custom object, scroll down to “Buttons, Links, and Actions” and click New Button or Link.

This concludes part (b).
2. On the “New Button or Link” page, fill in the fields as follows:
Label: S-Docs Mobile
Name: S_Docs_Mobile
Display Type: Detail Page Button
Behavior: Display in existing window without sidebar or header
Content Source: URL
Leave “Select Field Type” as the name of your object, and paste the following in the Custom Button or Link Editor:
{!URLFOR(
  '/apex/SDOC__SDCreate1?id='
  + ChangeToYourObjApiName.Id
  + '&Object=ChangeToYourObjApiName'
  + '&lightningNav=true'
)}

If you are making the button for a standard object, the API Name is the same as the object name for all objects (e.g. the API name for an opportunity is Opportunity) except for products; for products, the API name is Product2.
If you are making the button for a custom object, you can find the API name on the same page you found the “Buttons, Links, and Actions” table on in 1b.
Once you finish pasting and editing the above code, click Save.
Step 2: Add the S-Docs Mobile Button to the Page Layout
1. Navigate to the Page Layouts for your object. For standard objects, please follow the instructions in part (a). For custom objects, please follow the instructions in part (b).
a) Adding the Button to a Standard Object's Page Layout
If you are adding the button to the Page Layout for a standard object, navigate to the Setup menu, type the name of your object into the Quick Find / Search bar, then click Page Layouts from the options that drop down under your object.
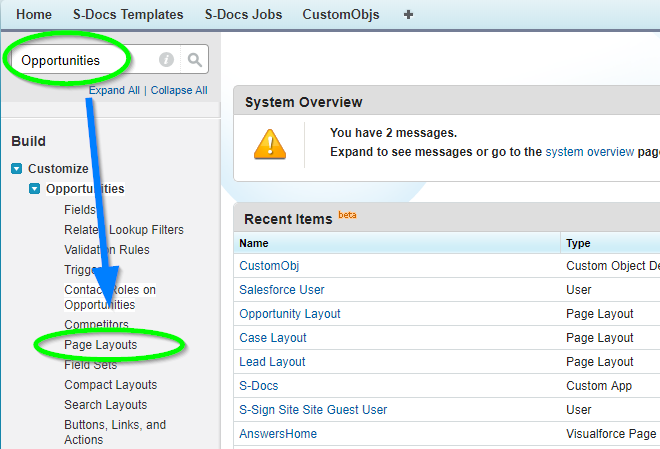
Click Edit next to “YourObjectName Layout.” For Accounts and Opportunities, there is a layout called “ObjectName Layout SDoc.” Do not edit this layout; rather, edit the layout called “ObjectName Layout.” In our Opportunity example, we are editing “Opportunity Layout.”

This concludes part (a).
b) Adding the Button to a Custom Object's Page Layout
If you are adding the button to the Page Layout for a custom object, navigate again to the Setup menu, type "Objects" into the Quick Find / Search bar, then click Objects.

Then, click the name of your object (not the Edit button).
After you click the name of your custom object, scroll down to “Page Layouts” and click Edit next to “YourObjectName Layout.”

This concludes part (b).
2. Scroll down to Salesforce Mobile & Lightning Experience Actions and click override the predefined actions. Then, click Mobile & Lightning Actions in the toolbar at the top of your screen.

Now, get rid of the standard S-Docs button by clicking it and dragging it anywhere within the toolbar.

After removing the standard S-Docs button, click and drag the S-Docs Mobile button into the "Salesforce Mobile and Lightning Experience Actions" group.

The resulting page should appear as follows:
Click Save to finalize your changes. S-Docs is now enabled for use with this object in the Salesforce mobile app!
Tags: Access/Permissions, Mobile, S-Docs Button